Celebrating diversity and making lemonade...

Celebrating diversity and making lemonade...

Sunday, October 30, 2022

Chicken Pumpkin Challenge

 In the Paddock

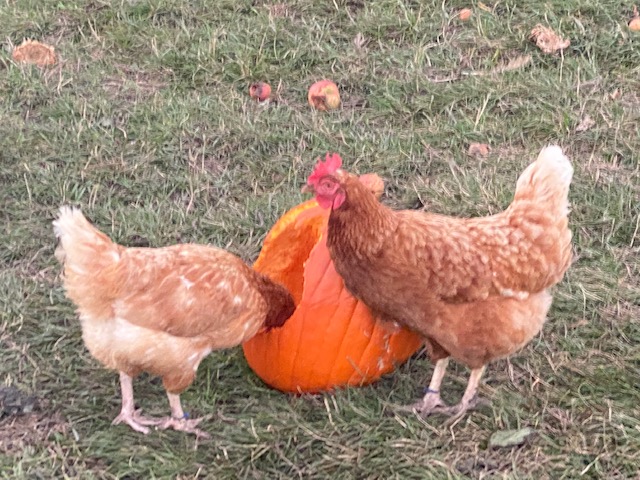
Had some fun letting the girls make a jack-o-lanterns!  This is part of a Chicken Pumpkin Challenge that has been going around on Tik Tok.  You scrape off a bit of the pumpkin where you want the chickens to peck and then let them create their own jack-o-lantern.  Here is the pumpkin with a little bit of the face scraped off...
The girls in the east coop dived right in and started pecking away...they even made their own holes in the back of the pumpkin!

They got one eye done so I took the opportunity to pull the pumpkin out of the paddock and grab a quick pic...
The girls were anxiously waiting for me to give them their pumpkin back...they ended up eating the entire pumpkin in just a few hours!
Here is the pumpkin in the west coop...they took a couple of days to get their jack-o-lantern completed...
Jack-o-lantern in the west coop...
I put the jack-o-lantern back in and they did a little more work on it...

So...just a little Halloween fun on the farm!

Have an eggcellent day!
~Denise

Sunday, October 16, 2022

Stew hens!

 In the Coop and Kitchen

The time had come to retire several of Mark's first hens that he bought to start his egg business.  I always knew this day would come and was not looking forward to it.  We did our best to make lemonade out of lemons and held a butchering class for people in the community.  Five people came and learned how to humanely kill, scald, pluck, and eviscerate a chicken.  
Everyone that came to the class got to take 2 stew hens home.  Then, we still had a few left so I put two stew hens in a bag and let them "age" in the cold room for several days before putting into the freezer.  They are for sale now in our online store! 
Next was to figure out how to to cook these ladies.  I have made bone broth several times but never cooked a stew hen.  Since these chickens were almost 3 years old, you can't just roast, bake or fry them.  The meat would be too tough for that type of cooking.   You have to cook them over low heat with lots of liquid - to stew them.  As muscles get older, they develop lots of connective tissue so the long slow cooking time is needed to break that tissue down, which in turn flavors the broth.  I decided to try two different methods of cooking.  

Method 1 is the Instant Pot:  I put one stew hen in a instant pot, added carrots, celery, and onion,  4 quarts of water and a splash of apple cider vinegar then pressure cooked it for 90 minutes.  I basically followed the information in this post: How To Cook Stewing Hens In Pressure Cooker  I did not add the spices that were featured in this blog post.  I like to keep the chicken broth neutral and add spices when I use it in a recipe.

Method 2 is the Crock Pot:  For the crock pot method, I just put the stew hens in the crock pot like I do when I make chicken broth from bones.  I put them in the crock pot (I was able to get 2 stew hens in the crock pot) and added celery, carrots and onion.   Another important thing that I included in both methods was a tablespoon of vinegar.  This helps to get some of the minerals out of the bones. 
I turned the crock pot on low and let it go overnight.
I strained off the broth and then let the hens cool down so I could pull the meat off the bones.  I got almost 2 cups of meat from one hen.  One thing I noticed is that the dark meat was very dark and the fat was very yellow!  While stewing hen meat is a little chewier, not as plump and juicy as young chicken, it has SOOOO much more flavor.
I chopped up the meat and used it to make enchiladas and they were great!  Since I had done 3 stew hens, I even had some extra meat that I put into the freezer to use in maybe a taco soup later this winter.
Here is a pic of the chicken enchiladas!  
I wanted to include a couple more links to information about cooking stew hens that I found useful:
How to Cook a Stewing Hen - this blog has links to some recipes on how to use the meat

After pulling off all the meat, I put the bones back into the crock pot and added some chicken feet (yes, I saved a few feet...they are GREAT for making broth) and let it go again over night.  I ended up canning up about 15 quarts of broth!
I prefer to the crock pot method.  Most likely because I am used to making bone broth using this method.  The instant pot is clearly faster but I don't mind waiting and the house smells amazing!
This is a great way to honor these ladies for the years of service that they provided.  We appreciate their service to Mark's egg business!

Have an eggcellent day!
~Denise


Sunday, October 2, 2022

Nest box woes and wins! Got Straw bales! Yeah!

 In the Coop

When the new chicken coop was finally completed, we were so "eggcited" to put the fancy rollaway nest boxes into there.  We got them mounted up right away and they looked so nice!  One of these extra large nest boxes is good for 70 chickens and that is about what we had in the coop so this was perfect.
Unfortunately, there were some problems with the fancy rollaway nest boxes.  First, the girls really did not like using it.  It is hard to explain but I could just tell.  Then, I started noticing that there were fine, hairline cracks in the eggs.  I would say that at least a dozen eggs a day would have these cracks and you can't sell eggs with cracks!  I called the manufacturer and explained the issue.  He asked if the boxes were level.  I said that they were mounted in the chicken coop and that the coop was built on a concrete pad.  I was not quite sure what he was asking.  Then, he explained that the eggs were coming down into to the collection area too quickly and to make sure the nest box was level.  Henry and I added some wood to the bottom of the box to help level it out but this seemed to continue to be an issue...
THEN, the worst thing happened.  The girls figured out how to stand in the nest box area and put their heads down into the collection area and eat the eggs!  I wish I had taken a pic of this but it was too upsetting for a pic.  I would open up the egg collection area and there would be a bunch of eggshells with holes in them.  One day I counted 15 eaten eggs!  I tried to punish the hens that were eating the eggs.  There were about 3 that figured out the system.  I would put them into the quarantine cage but as soon as they were let back out, they went right back to it.  It was like a game for them.  Once a chicken learns this type of behavior, it is really hard to detour.  The whole idea of the rollaway nest boxes is that the eggs rollaway so that the chickens can't get to them!  

We decided to just purchase some regular old nest boxes and put them up around the coop.  This seems to work fine...
...AND even though the eggs are just sitting right there...out in the open...no one eats them!  It is somewhat bizarre to me but I am glad it works.
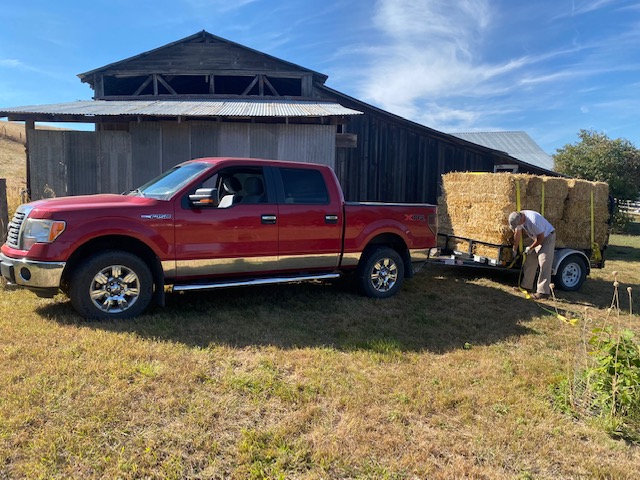
So, one reason I could not get around to writing some blogs this past summer is that I spent a lot of time working through the new forever flowers, feed and nest box issues...hoping we are on a good path at this point.  Also, there has been a serious shortage of small straw bales.  We got one load of straw bales last fall and I was confident that they would last until the summer.  Boy, I was way off.  The girls and ladies use a lot of straw!  This past week, I found a local farmer that had small straw bales and we got some!  Yeah!  This time we got 2 trailer loads!
Ollie, the cat, helped us unload the straw...you almost can't see him...he is "straw" colored...LOL...
...and put into the barn!
It has been a crazy summer season and now I am happy we have:

Straw in the barn for the winter!  
A great new feed dealer!  
And hens laying eggs in their nest boxes and not eating them!  

It's the simple things!

Have an eggcellent day!
~Denise


Sunday, September 18, 2022

Feed woes and wins!

 On the Farm

Sometimes things just don't go according to plan...We knew that there would come a time that we would need to get poultry feed in bulk.  When I say "bulk", I am talking about tons of feed at a time.  If you go to the local farm store, you can buy 50 pound bags of feed.  We would go through a 50 pound bag of feed each day with all the ducks and chickens that Mark has.  We were buying 40 pound bags of feed from a local farmer and we were getting like 25 bags at a time.  This would last about a month and this is when Mark had 70some chickens and 40some ducks.  Since that time, we have added another 70some chickens.  The point is that this a lot of feed to move around by hand!  I started researching about feed bins and got in touch with a lady on a local Facebook homesteading group.  She sells feed and I was asking her about how she gets the feed and sorts it out for people.  She also had an egg business at the time, but has since sold her egg business.  She had a big portable grain bin and this seemed like a good way to go for buying feed.  She gave me the name of the individual that she purchased her feed bin from.
Three ton portable feed bin

Luckily, he was located in Post Falls, Idaho which is a couple hours north of where we live now.  We contacted the individual and set up a day and time to go and pick one up.  I also asked if he knew of any place where we could go and take it and get it filled!  He gave me the name of 3 local grain mills and I made some calls.  One of the mills was "kind of" on the way home so we set it up to get a ton of feed from them.  The portable feed bin holds 3 tons of feed but we could only afford to get one ton at the time.  I am going to call this first grain mill the "Valleyford" grain mill from now on (because it was located near a town called Valleyford).  
Filling the feed bin at Valleyford

There is a local grain mill that is only about 15 miles from our home.  BUT they are so popular that they have a wait list to get in and purchase feed from them!  We got on the wait list in January when we got our feed bin.  However, we were going to have to do something else in the meantime.  The individual that we were purchasing feed from in 40 pound bags stopped providing feed.  I literally got a text message from him while driving home with the new feed bin saying that he was getting out of the feed business.  Talk about timing!
Feed going into the feed bin

Okay...we got home with the grain bin and the feed.  This one ton would last about a month.  The Valleyford feed mill was 1 hour and 45 minute drive...one way!  I had been talking to another farmer that sells feed and they were much closer...about 40 minutes from our home.  It was a little challenging to work with him and he didn't always have feed but at one time it finally worked out that he had feed available and we needed some.  We headed out there to get a ton of feed.  We will call this one the Colfax grain mill.  The feed looked different and it had garbanzo beans in it.  They kept going on and on about how it was such good feed.  Colfax grain mill was cheaper and closer than the Valleyford feed mill so we decided to give it a try.  We brought it home and almost immediately, I realized that it was probably NOT even chicken feed.  No one would eat it...not the chickens and not the ducks.  They hated the garbanzo beans!  AND I don't think there was any minerals in it because we started getting soft shelled eggs.  I have no idea what they sold us but it was not good...and we had a ton of it!
The cats were very curious about the grain bin when we brought it home.

Shortly after getting this bad feed into the bin, I noticed another new local feed mill in our area.  It might sound odd but as the feed goes into the bin, the feed on the top actually get pulled through and comes out the bottom into the bucket first.  I say this to tell you that I had a great idea of putting some "good" feed on top of the bad feed and then it would "mix" together to kind of dilute the bad feed  as it came out the bottom of the bin.  We will call this one Garfield grain mill.  I asked what the price of a ton of feed was and it was a good price!  It was also fairly close...about 40 minute drive one direction.  We headed out and got the feed.  Then, we got the bill.  It was TWICE as much as I was expecting!  I think I even felt my heart skip a beat.  I almost wanted to cry...it was WAY more than we could hardly afford.  I asked for clarification.  See...I had asked for the price of a ton of feed.  She had replied with the cost of 1000 pounds.  If you didn't know, a ton is 2000 pounds.  SO...I thought I was getting a great deal on a ton of feed but it was only half of the price.  Does that make sense?  It was totally a miscommunication.  I just assumed that when I asked for the price of a ton of feed that she was giving the the cost of a ton of feed but her text clearly says 1000 pounds is $X amount.  It was super great feed but just way too expensive.  Like several hundred dollars more expensive than Valleyford grain mill.

We finally got through all the bad and expensive feed then needed more feed, naturally...the chickens and ducks want to eat every day...who knew.  We went back to Valleyford grain mill even though it takes a couple hours to drive there, an hour for the feed to load into the bin, and then a couple hour drive back.  It makes for a long day.  We even almost got into a super bad accident on the highway on the way there this time.  It is a little hard to explain but we had been following a truck hauling a boat for most of the way.  All of a sudden, I see them pull over onto the shoulder...remember, we are all driving 60 MPH.  The reason he hit the shoulder is because there was a truck stopped in the highway wanting to make a left hand turn in front of him.  I was trying to decide which one I wanted to hit because we were going WAY too fast to come to a stop.  I decided it was best to hit the boat but then at the last second I decided to go into the lane of the oncoming traffic.  LUCKILY, the car in the oncoming traffic realized what was happening and had pulled over onto their shoulder.  So, I flew through going about 40 MPH and we were all lined up 4 vehicles across the highway.  Then, the truck with the boat pulled in behind me and we just all kept going like it was supposed to happen that way.  My heart was pounding like a hundred miles a minute and I just could NOT believe that we didn't hit someone!  
A throwback pic of Mark feeding chickens!

Okay...back to the feed...the first batch of feed we got from Valleyford grain mill was ground up very fine and it kept getting like "stuck" in the bin.  I would have to open the top and climb up there and knock it down with a hoe.  Remember, this is back in the winter when things are cold and icy.  I did not like having to climb up the steel ladder and try to knock the feed down while balancing and trying not to fall down 10 feet to the ground below.  I asked if they could do a more course grind, hoping that it would flow out of the bin better and they were able to do that and it worked great! 

In late summer, we needed more feed and we went back up to Valleyford grain mill and I asked for the course grind.  Unfortunately, this time, the feed did not get ground up enough and we ended up with a lot of whole peas in the feed.  The poultry cannot eat whole peas so there was quite a bit of waste in this batch.  The whole peas would plug up the feeders and it was a mess.  You can see the peas in the bottom of this feeder...

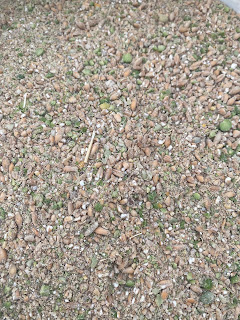
I was going to have them just grind it up fine again the next time BUT WE FINALLY GOT THE TEXT THAT WE WERE OFF THE WAITLIST AT THE LOCAL GRAIN MILL!!!  This is such a blessing!  We can drive there, get the feed loaded and drive back home in less than an hour!  AND...it is the BEST feed!!!  The girls and ladies all LOVE it!  So happy!!!  Here is a close up of the feed that we have now...it is perfectly ground...
I know this blog has been a bit of a rant...who knew that getting feed for poultry could be so challenging!  I thought we were going to have to start our own grain mill business!  I hope this local grain mill never goes out of business!!!  I know there are lots of exclamation marks in this post too!!!  BUT we are SO happy!!!

Have an eggcellent day!
~Denise


Sunday, September 4, 2022

Welsh Harlequin ducks??

 In the Coop

A couple of weeks ago, there was a post on a local homesteading Facebook page that a pair of ducks were available.  The breed is called Welsh Harlequin.  
I have always been interested in this breed for Mark's egg business.  Before we got any ducks, I spent a lot of time researching breeds.  The Welsh Harlequin is a great egg layer.  I started reading about hatching eggs to produce our own new ducklings and it got really complicated, very quickly.  To purchase a good incubator was very expensive (several hundred dollars).  Then, what would we do with the drakes (males - this was before we were processing meat chickens).  I then discovered the Golden Hybrid 300 egg laying ducks and this seemed to be a good way to go to get the egg business started.  But the idea of having our own breeding system to replace old layers never went out of my mind...a way of being more sustainable...

Then, last September, the opportunity came up to purchase some Khaki Campbell ducks and a drake (Dudley).  
Khaki Campbell ducks and drake
Khaki Campbells are well knows in the duck world as excellent egg layers.  I was told that the mother of the drake laid over 320 eggs in her first year.  That is a lot of eggs for one duck!  The plan was to sequester them into their own pen this last spring (2022) and let them hatch out some replacement ducks.  This just never happened because I got busy with the meat chickens earlier this year.  Also, we were getting SO many eggs this past summer (we had a 90% lay rate for much of the spring/summer!).  It did not seem like we needed more egg layers right away so that project got put on the back burner. 

One thing that bothers me about the Khaki Campbell and the Golden Hybrid 300 is that the ducks are high strung and energetic.  I have read that the Welsh Harlequin resulted from a couple mutant Khaki Campbell ducks that were bred specifically to create a new breed in 1949 so it is a relatively new breed.  The ducks are active but more docile.  I was talking with a women at the Farmers Market and she mentioned that she had some Welsh Harlequin and the drakes got larger than the Khaki Campbell drakes so that they are better for dressing out.  As soon as she said this, I knew that we had to get back to the original plan of growing out the Welsh Harlequin...
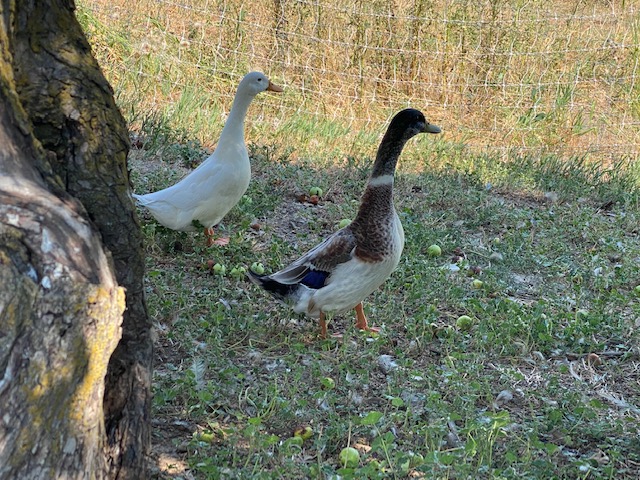
Female and male Welsh Harlequin ducks
The duck and drake that we purchased were hatched on the same day but I don't know if they are related.  I think it is safe to say that they probably are related.  Also, the female we got is all white.  The Welsh Harlequin I have seen online have creamy white heads with brown "stippling" which is a way of saying brownish spots all over them.  To introduce some variability and get back to the original breed description, we got some Welsh Harlequin ducklings!


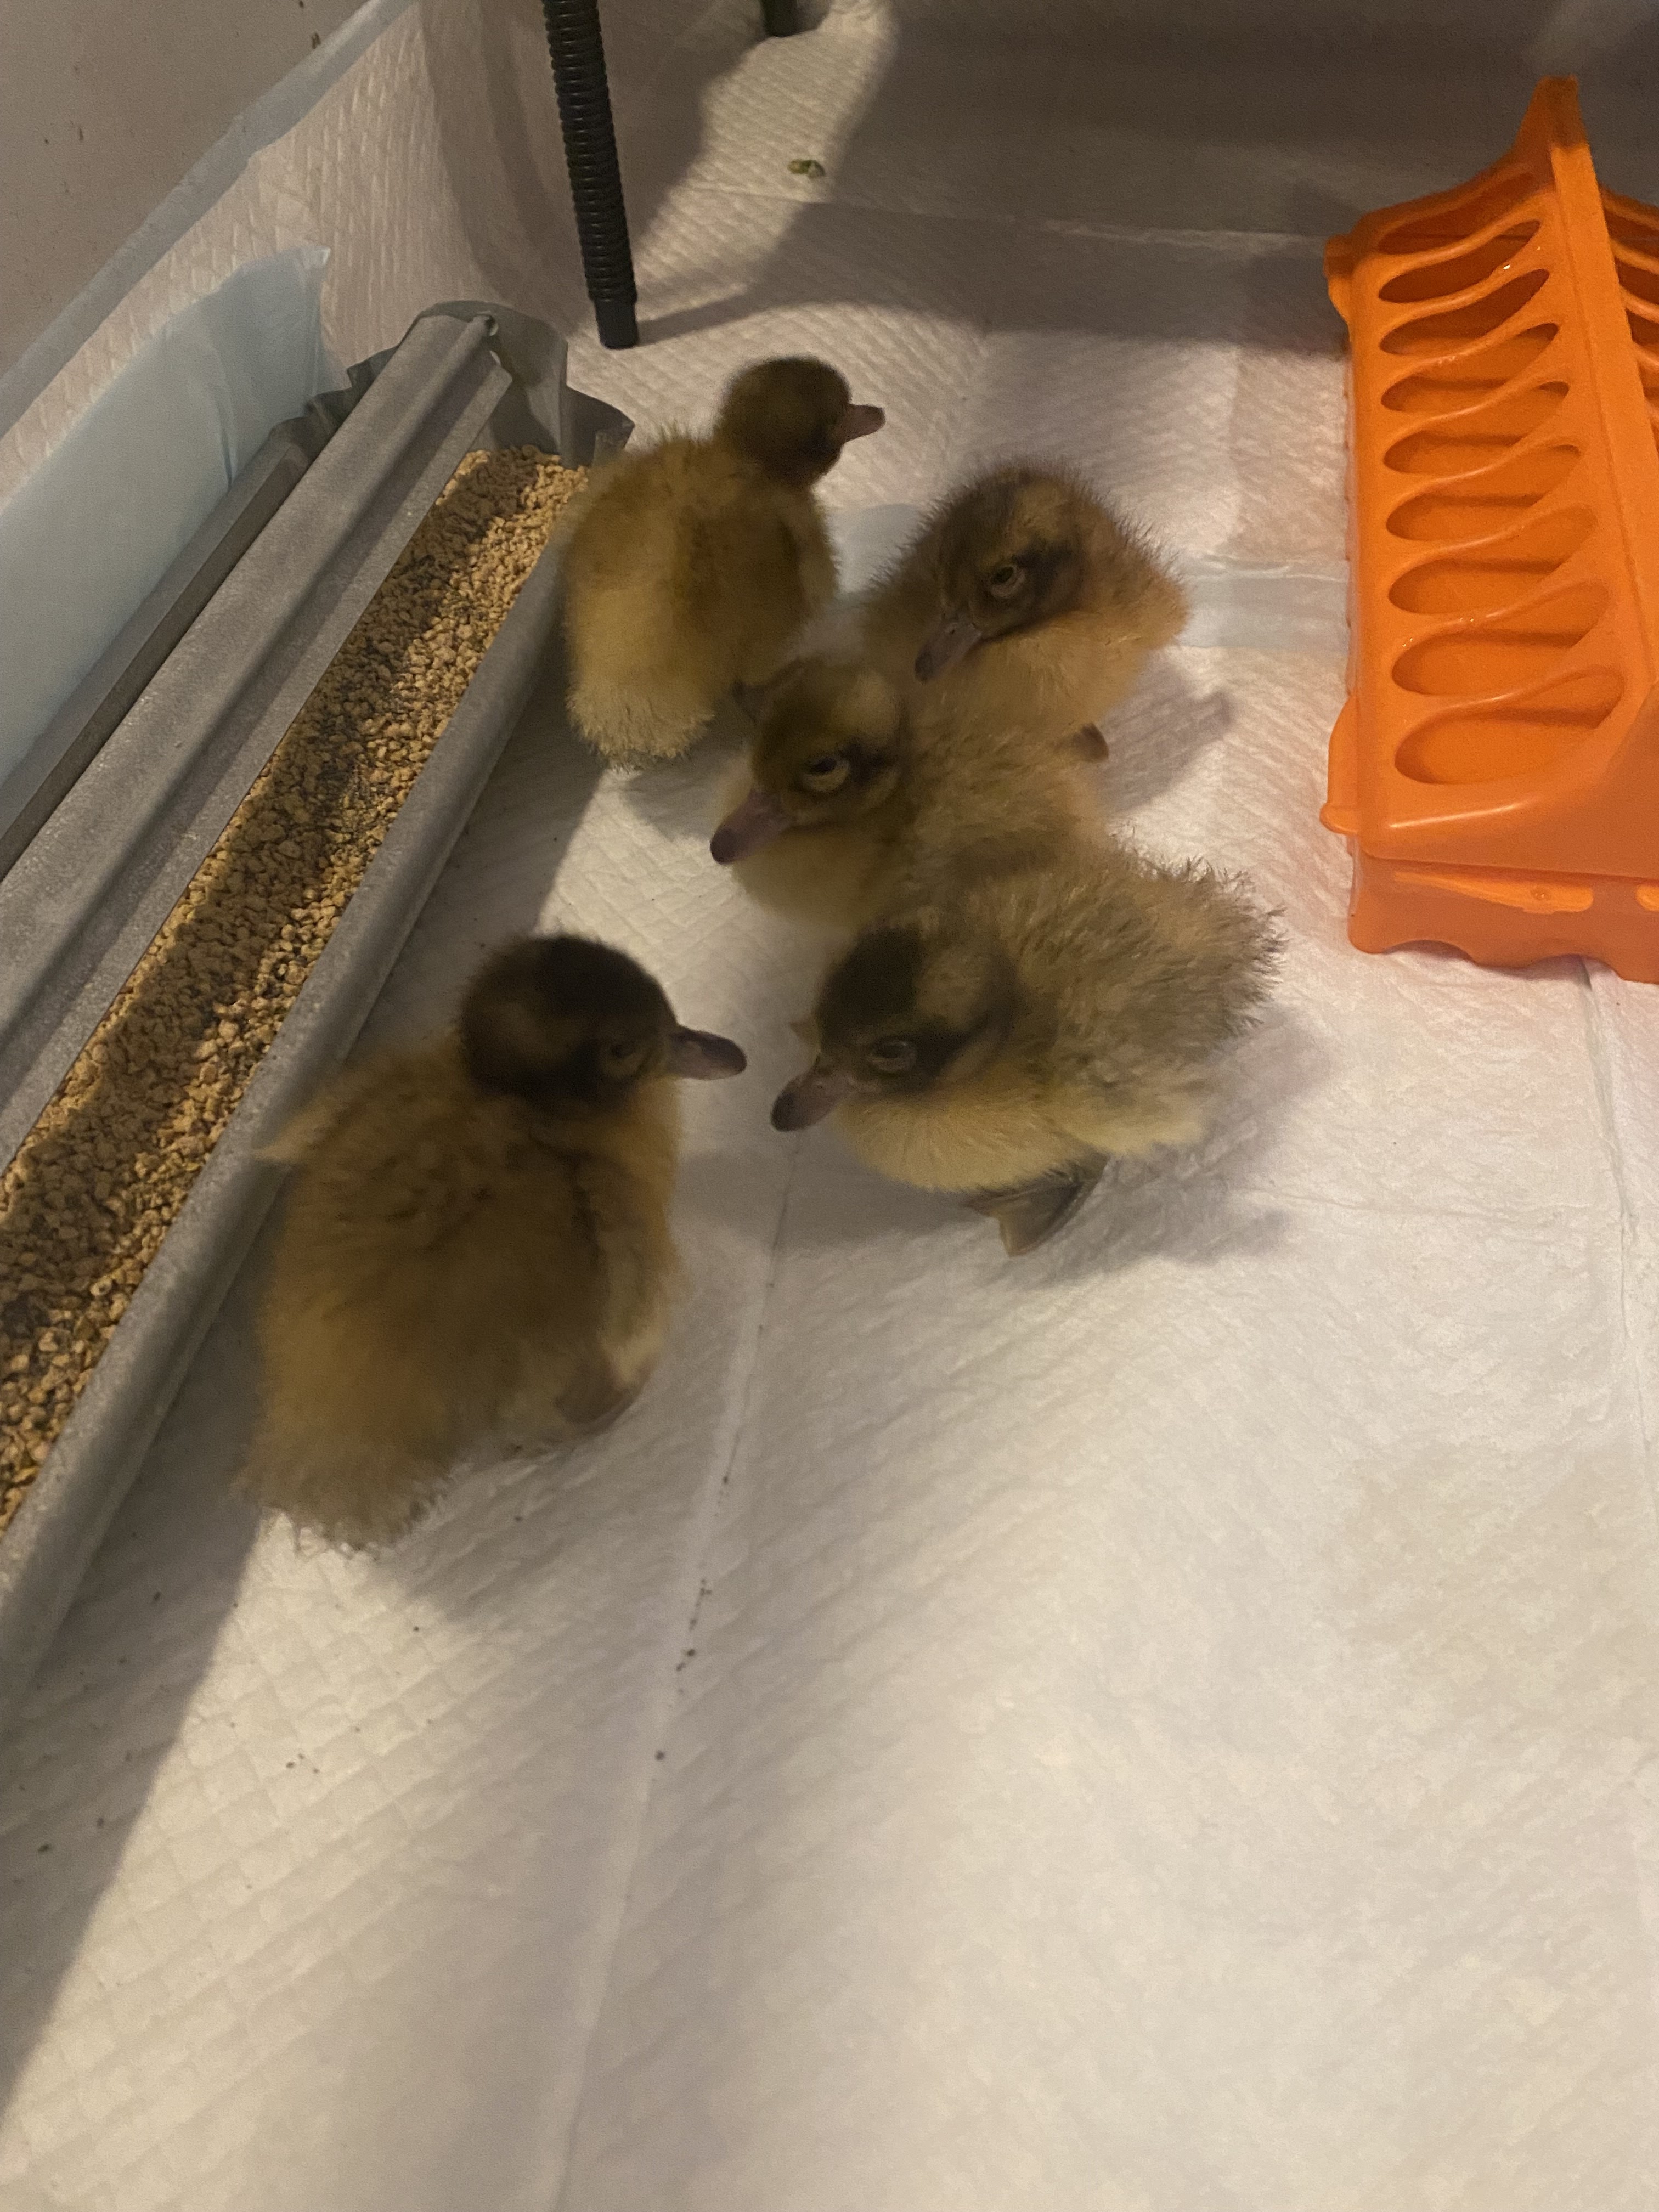
Unfortunately, one of the ducklings passed yesterday.  So, we have 4 ducklings.  Another nice thing about the Welsh Harlequin is that you can sex them by the color of their bills when they are born!  So, it should be easy to separate out the drakes and grow them out for meat.  I actually had someone ask just last week if we had duck meat for sale.  I have also read that they pluck out more easily than other waterfowl.  This is a plus because I have read that plucking duck feathers is more challenging because their feathers are water resistant and harder to remove.  

We will probably not even be able to breed the Welsh Harlequin next summer because they are just ducklings and it takes several months for them to mature.  In the best case scenario, we will be able to breed them late next summer (about a year from now)...we will see...so that is our duck story and it may seem a little convoluted but sometimes that happens when you are figuring things out...

The days are getting shorter and I need to get the coop lighting set up...
Have an eggcellent day!
~Denise


Sunday, August 21, 2022

Garden 2022

 In the Garden

The garden has been a little neglected this year because of the flower farming.  BUT...some things are finally starting to take off!  I know I probably sound like a broken record about this but the cool, wet spring really kept things from getting a good start.

My radishes grew well.  In fact, I had so many that I made some radish kimchi.  I liked it so much that I decided to plant some more radish called daikon radish and they grow like super big!  Like a foot long...we will see how this goes...

Cider enjoys hanging out in the garden!
Baby watermelon are so cute!  I think I saw a total of 4 watermelon growing...
Harvested this cabbage this last week and made a 1/2 gallon jar of sauerkraut.  It is fermenting now and will be finished next week...
The onions are doing well!
Here are the sweet potatoes.  I have tried to grow them the last 4 years with little success.  Feeling a little more optimistic this summer but we will see if there are any potatoes under those vines soon...
Some Jacob's Cattle Bens and celery in the background.
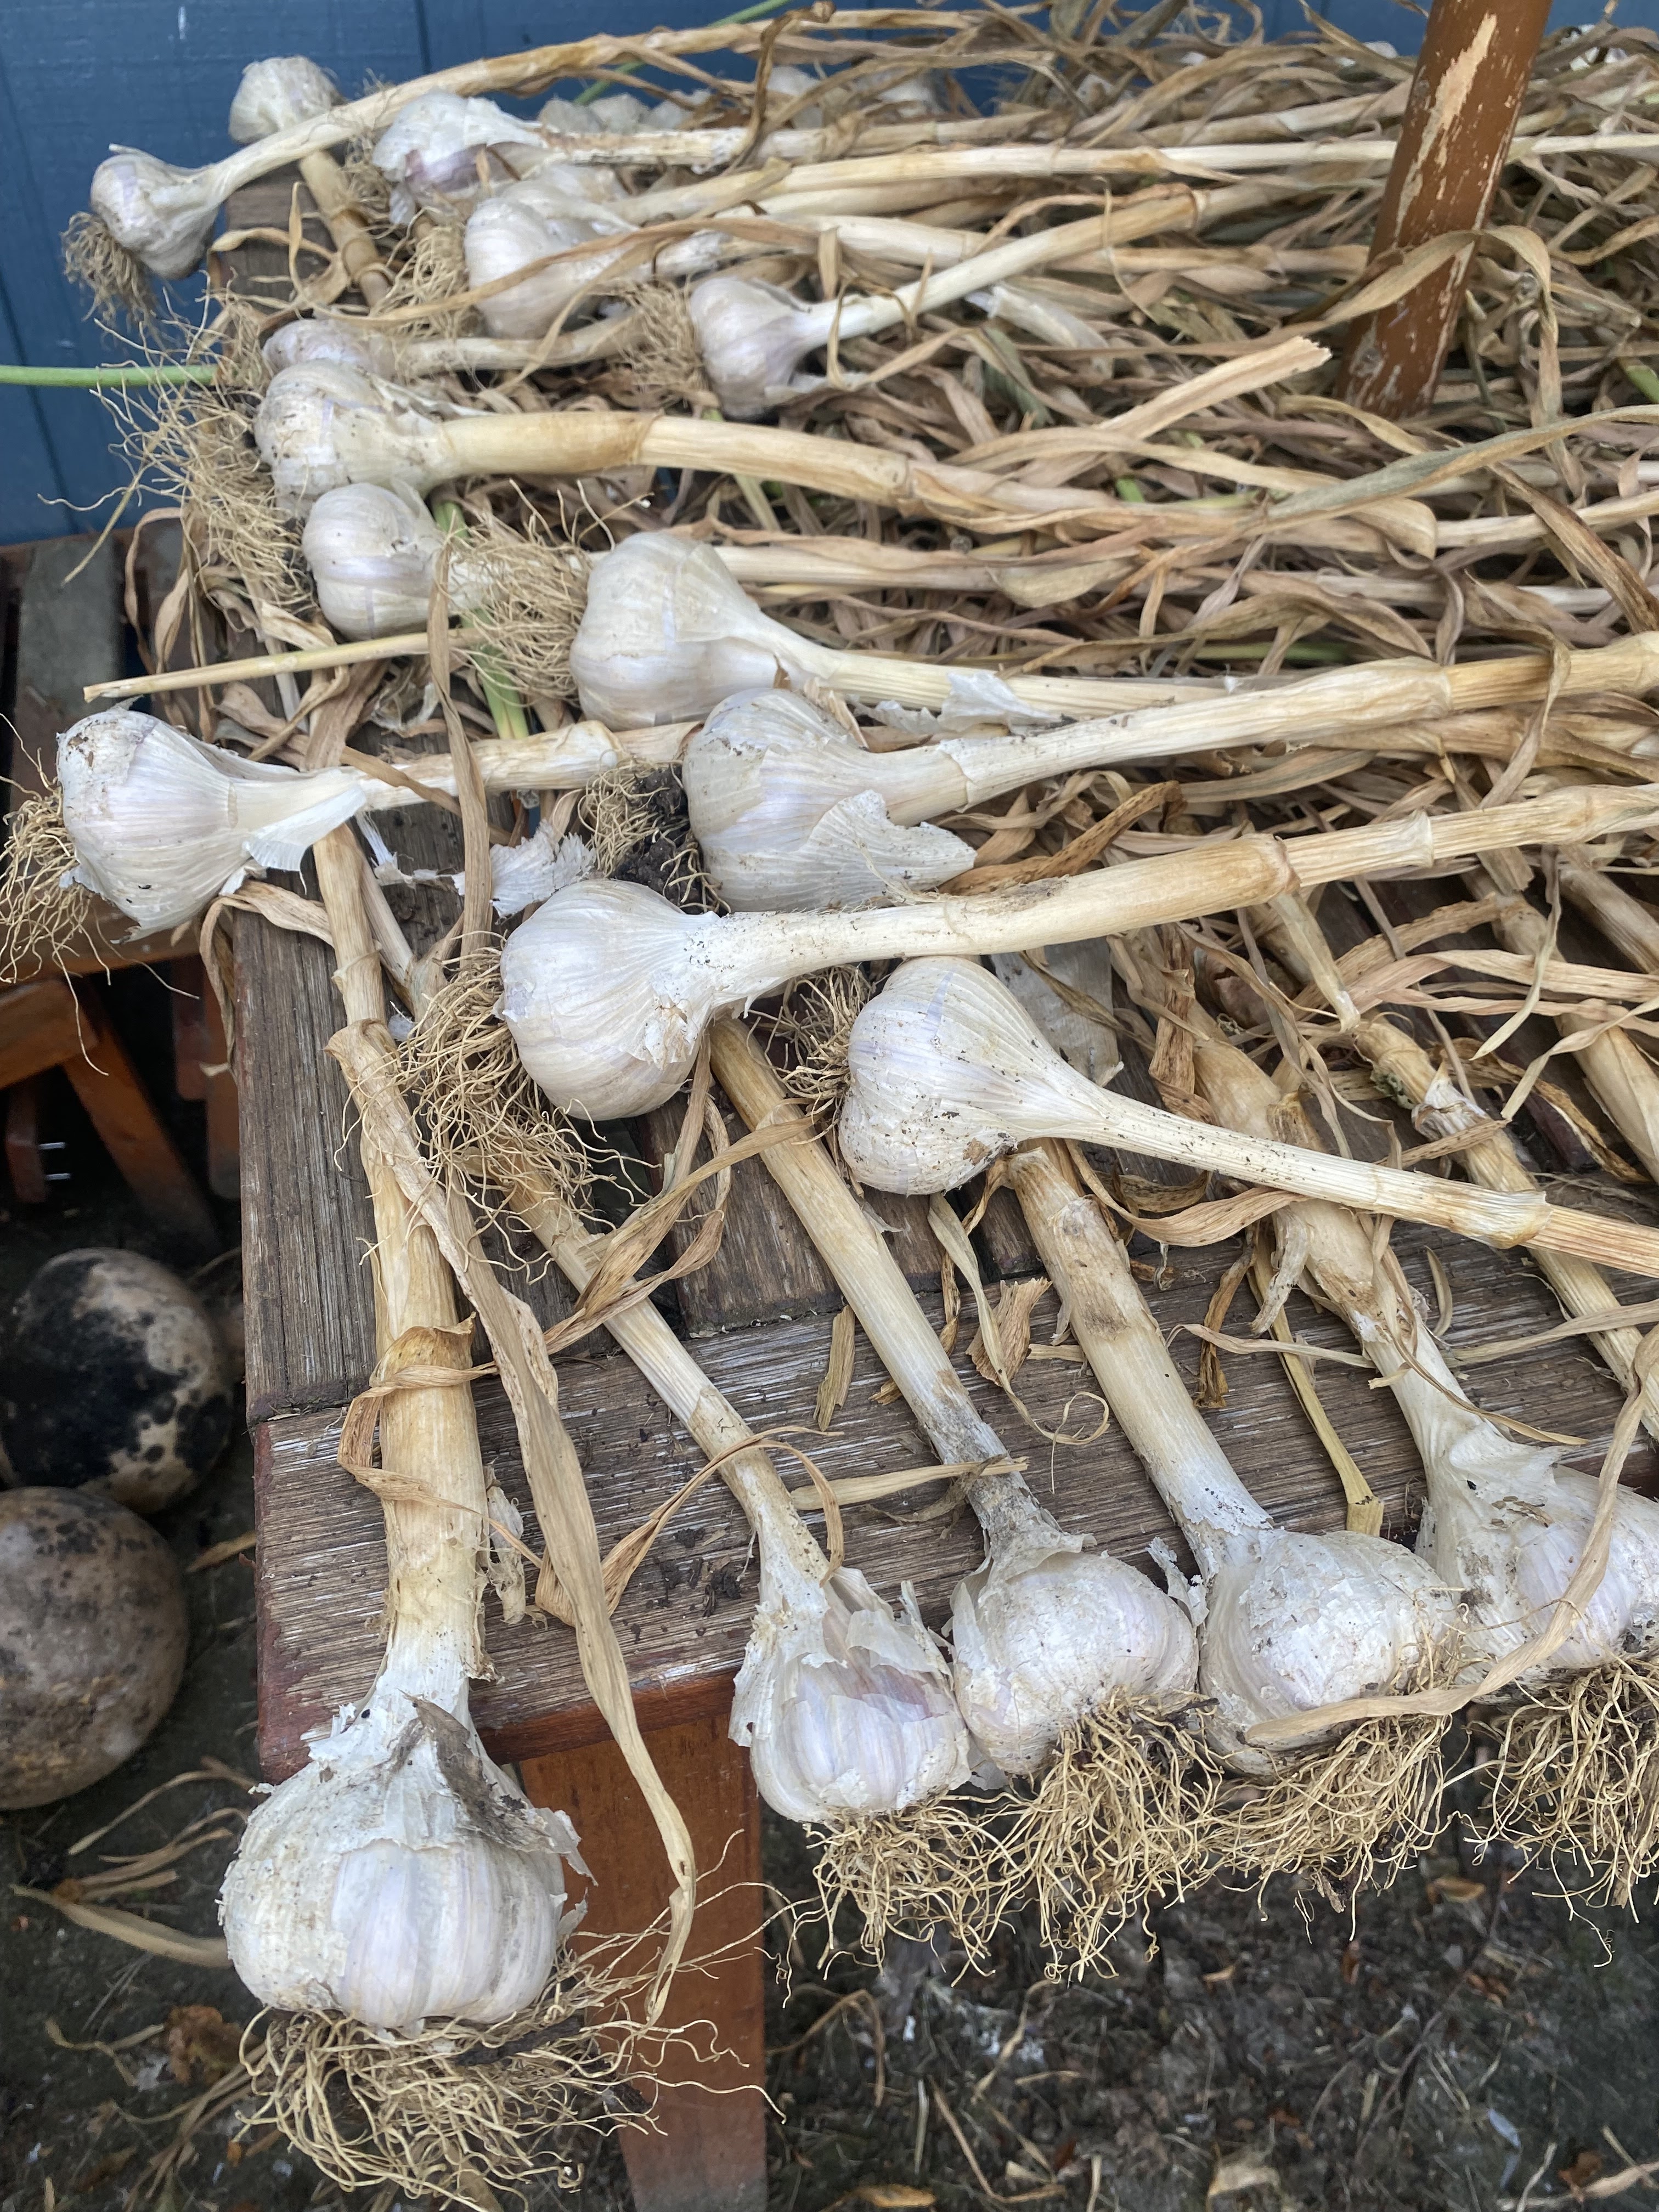
Pulled the garlic the end of July and it is about down drying down.
Basil and tomatoes!
Used the tall sunflowers as "poles" for some pole beans and I have just started harvesting some of the beans...
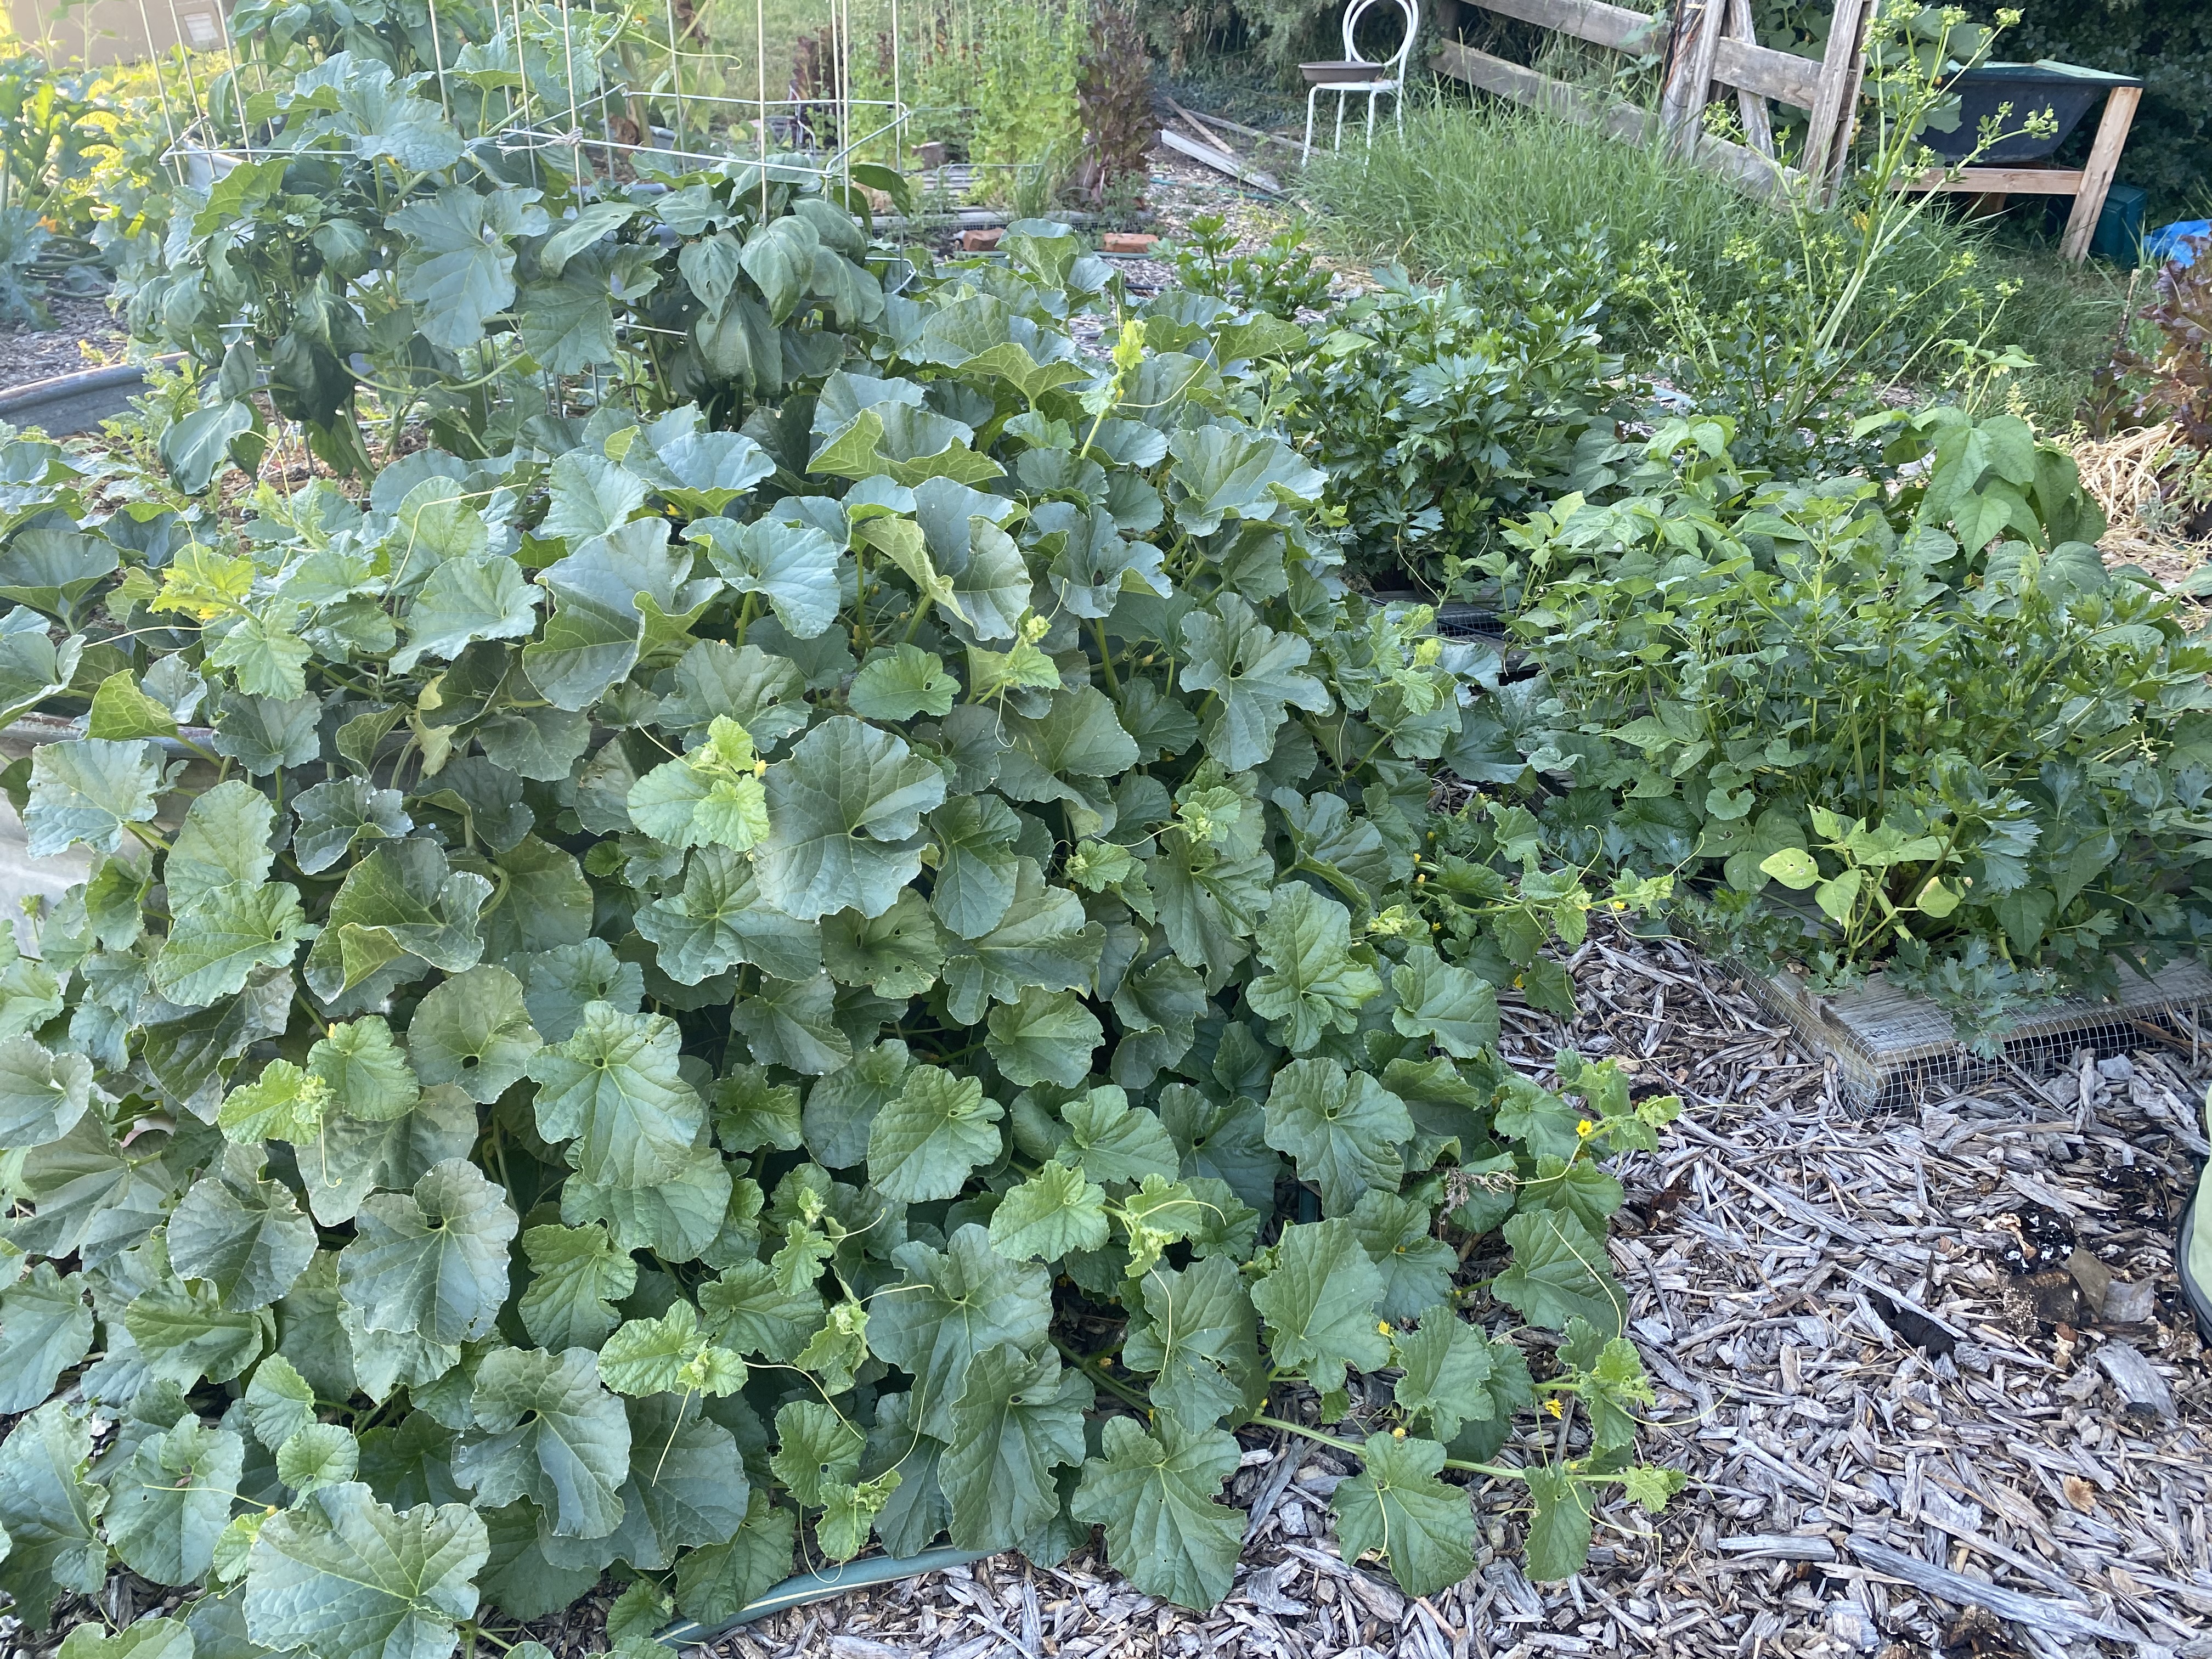
This cantaloupe vine looks amazing...waiting for the cantaloupes to develop! 
Tried a new heirloom zucchini variety called Cocozelle.  It is striped and we have too many!
The beet seeds got eaten by some birds so we only got a couple of beets.  I planted some more when I planted the daikon radish and they are coming up slowly.  Got a little bit of broccoli but then the flea beetles came in and demolished it.  Same with the kale and swiss chard...ugh...flea beetles!

Have an eggcellent day!
~Denise


Sunday, August 7, 2022

Forever Flowers!


 In the Flower Garden

I know it has been a few weeks since I put out a blog post but things have been VERY busy!  Lots of planting and re-planting this past spring.  The weather was so wet and cool, it seems that it was hard for plants to get growing.  Decided to try and plant some everlasting flowers this year for something different.  They keep their color even when they are dried.  I picked 10 different flowers.  I only got 5 of them to grow.  That was a little disappointing at first but I have been so busy that I have not had much time to despair.  Here are a couple pics of some flowers that I have picked and are drying...


Now, let me back up and go through the flowers that grew!  Let me start with the Love Lies Bleeding which is a type of Amaranthus.  This is a type of pigweed.  I did my Masters thesis on identification of 10 different pigweeds so this one had a special place in my heart!  It was by far the largest plant.  It is in the background of this pic and it grew as tall as me.  
It produces these long, reddish flowing flower heads and they are so beautiful!  I took a bunch to the Farmers Market last time I went and someone walked by and offered to buy them.  Sold!
This flower is called Globe amaranth but it is not an Amaranthus species (at least I don't think so).  It's scientific name is Gomphrena.  There are little flowers and they have a really neat flower with lots of detail.  It reminds me of a round seashell pattern.  There are white and purple ones...


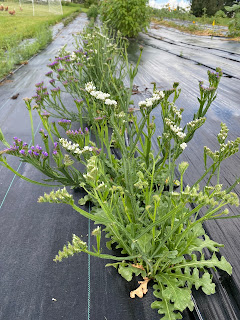
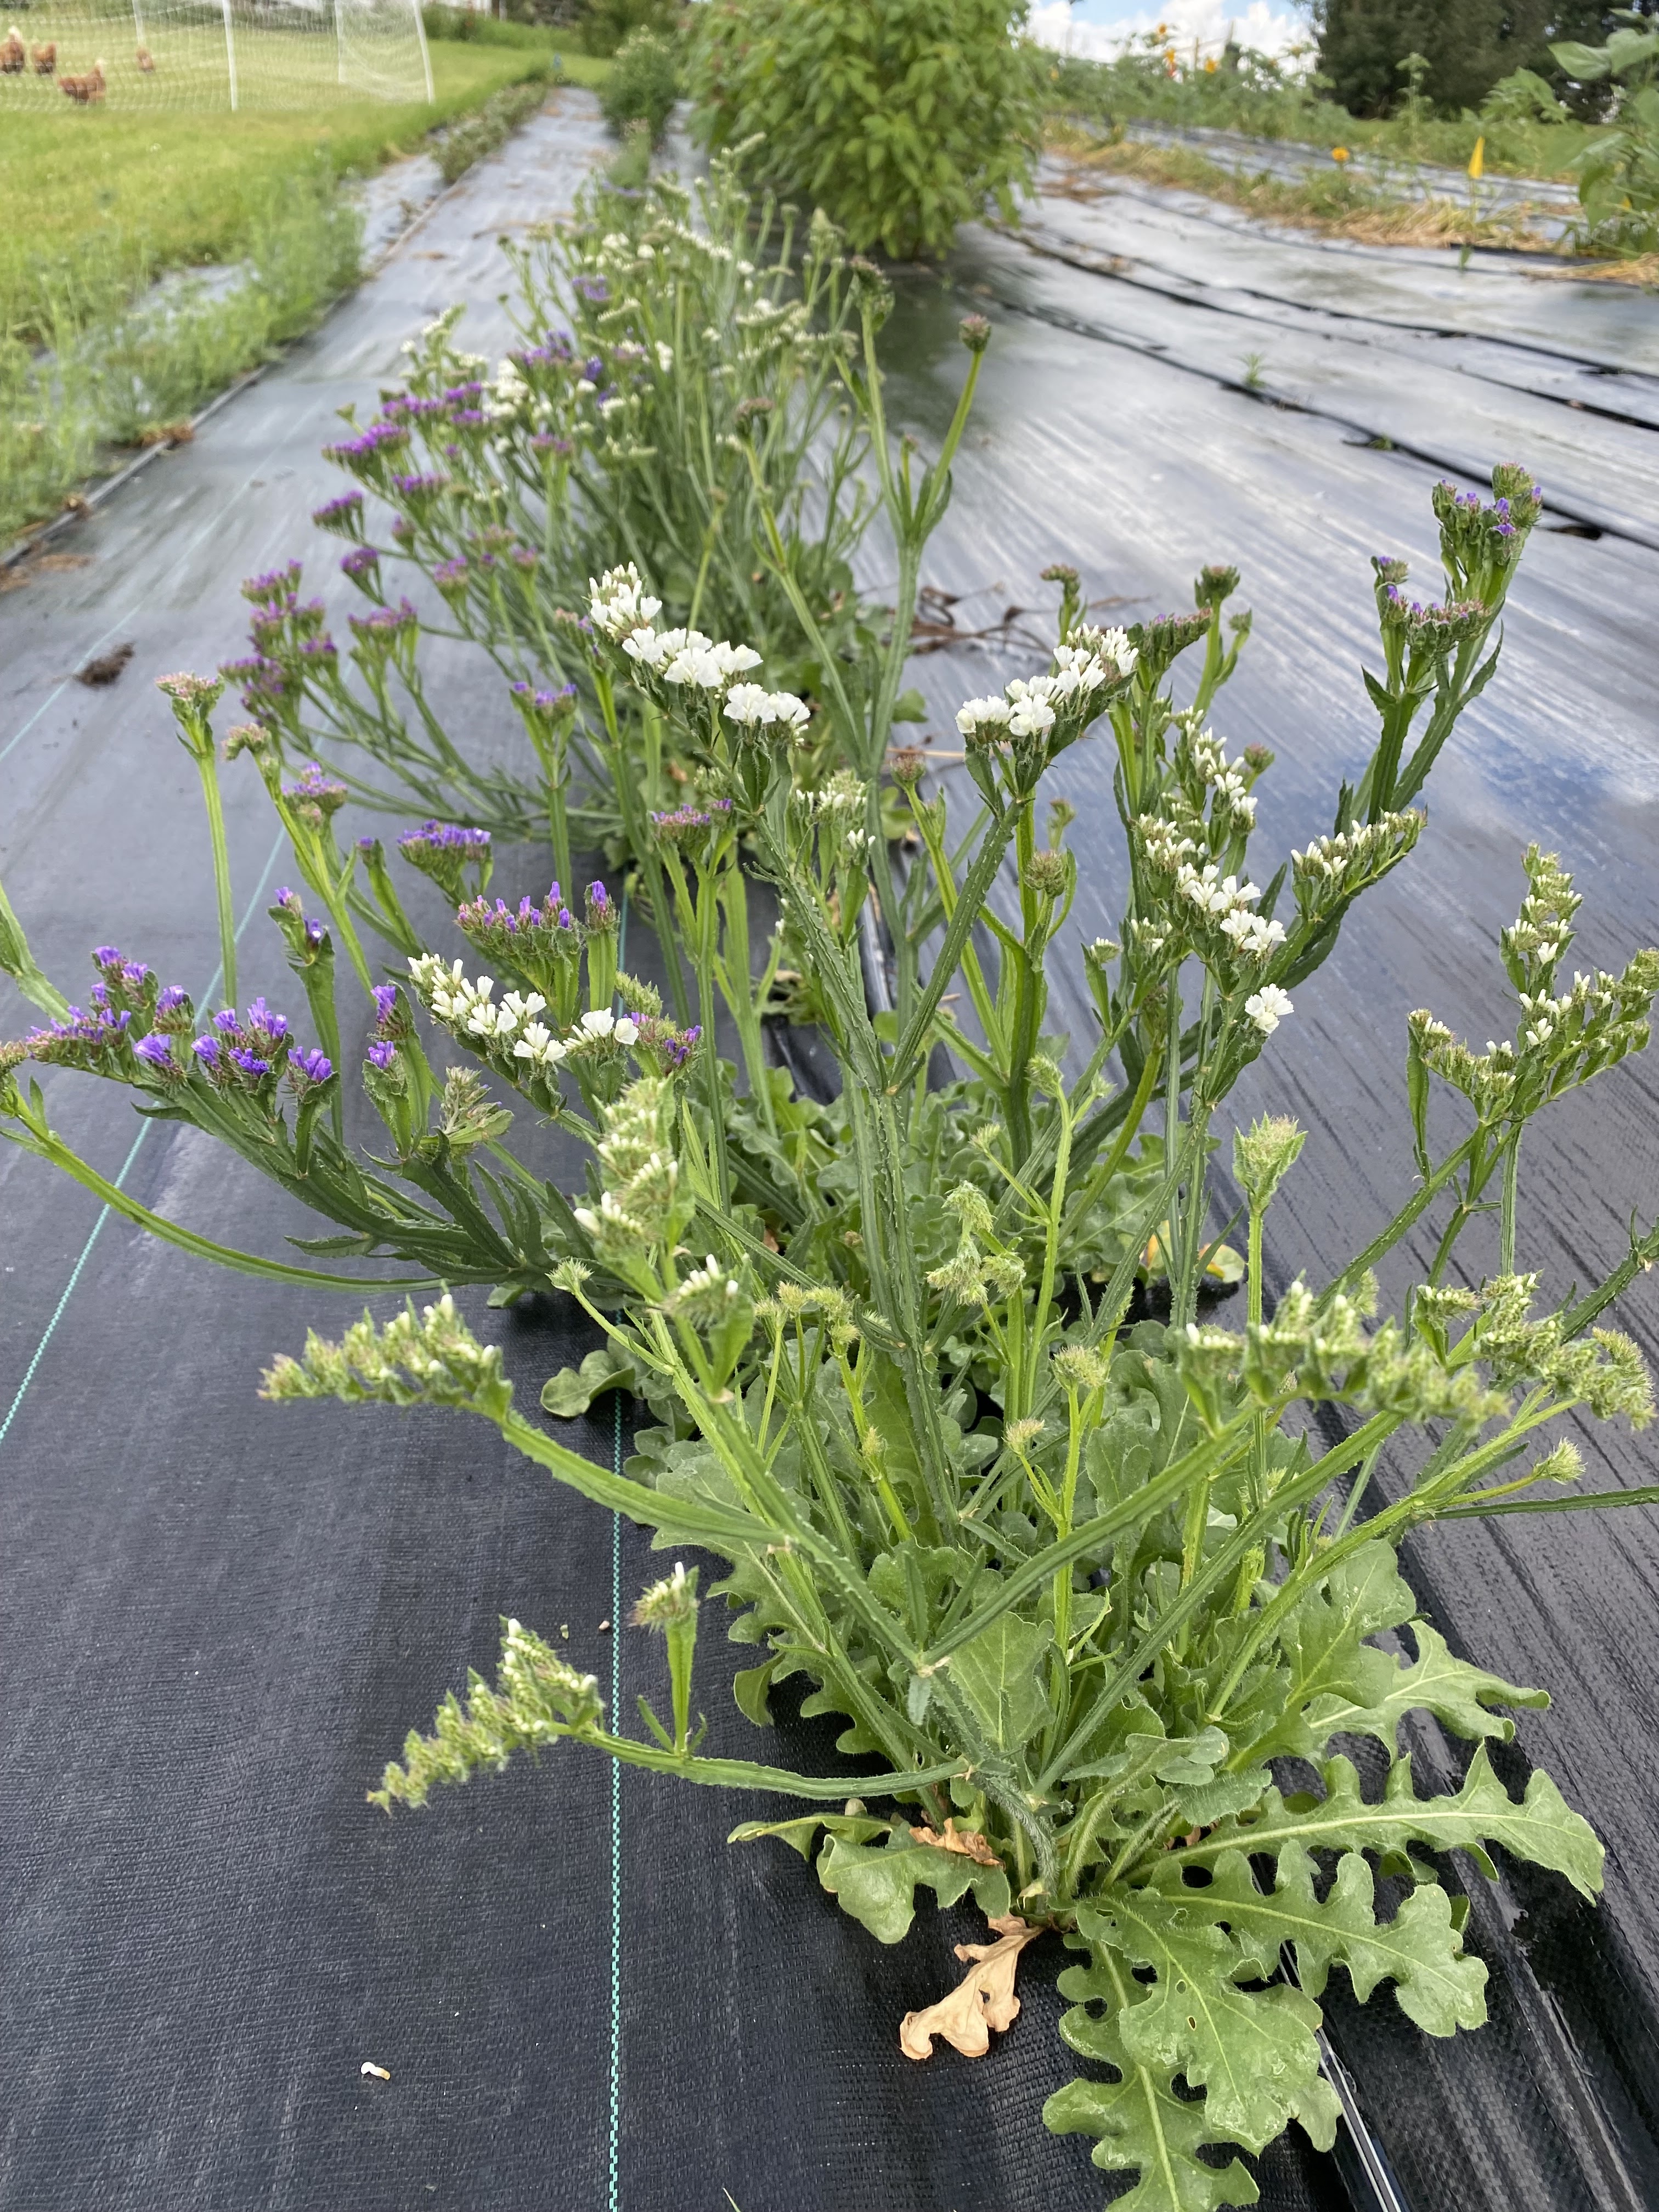
This flower is called Statice and I am REALLY liking it.  It has a unique growing pattern with a whorl at the bottom and then sends up the flower stalks.  They look like they belong in the desert or another planet...
I feel that a bouquet of them is pretty all by itself!  Ignore my dirty sleeve...LOL!
This is a type of Nigella and it is called Love in the Mist. The flowers are pretty but I don’t care for the way they dry down...
...BUT they do make some interesting seed pods though!
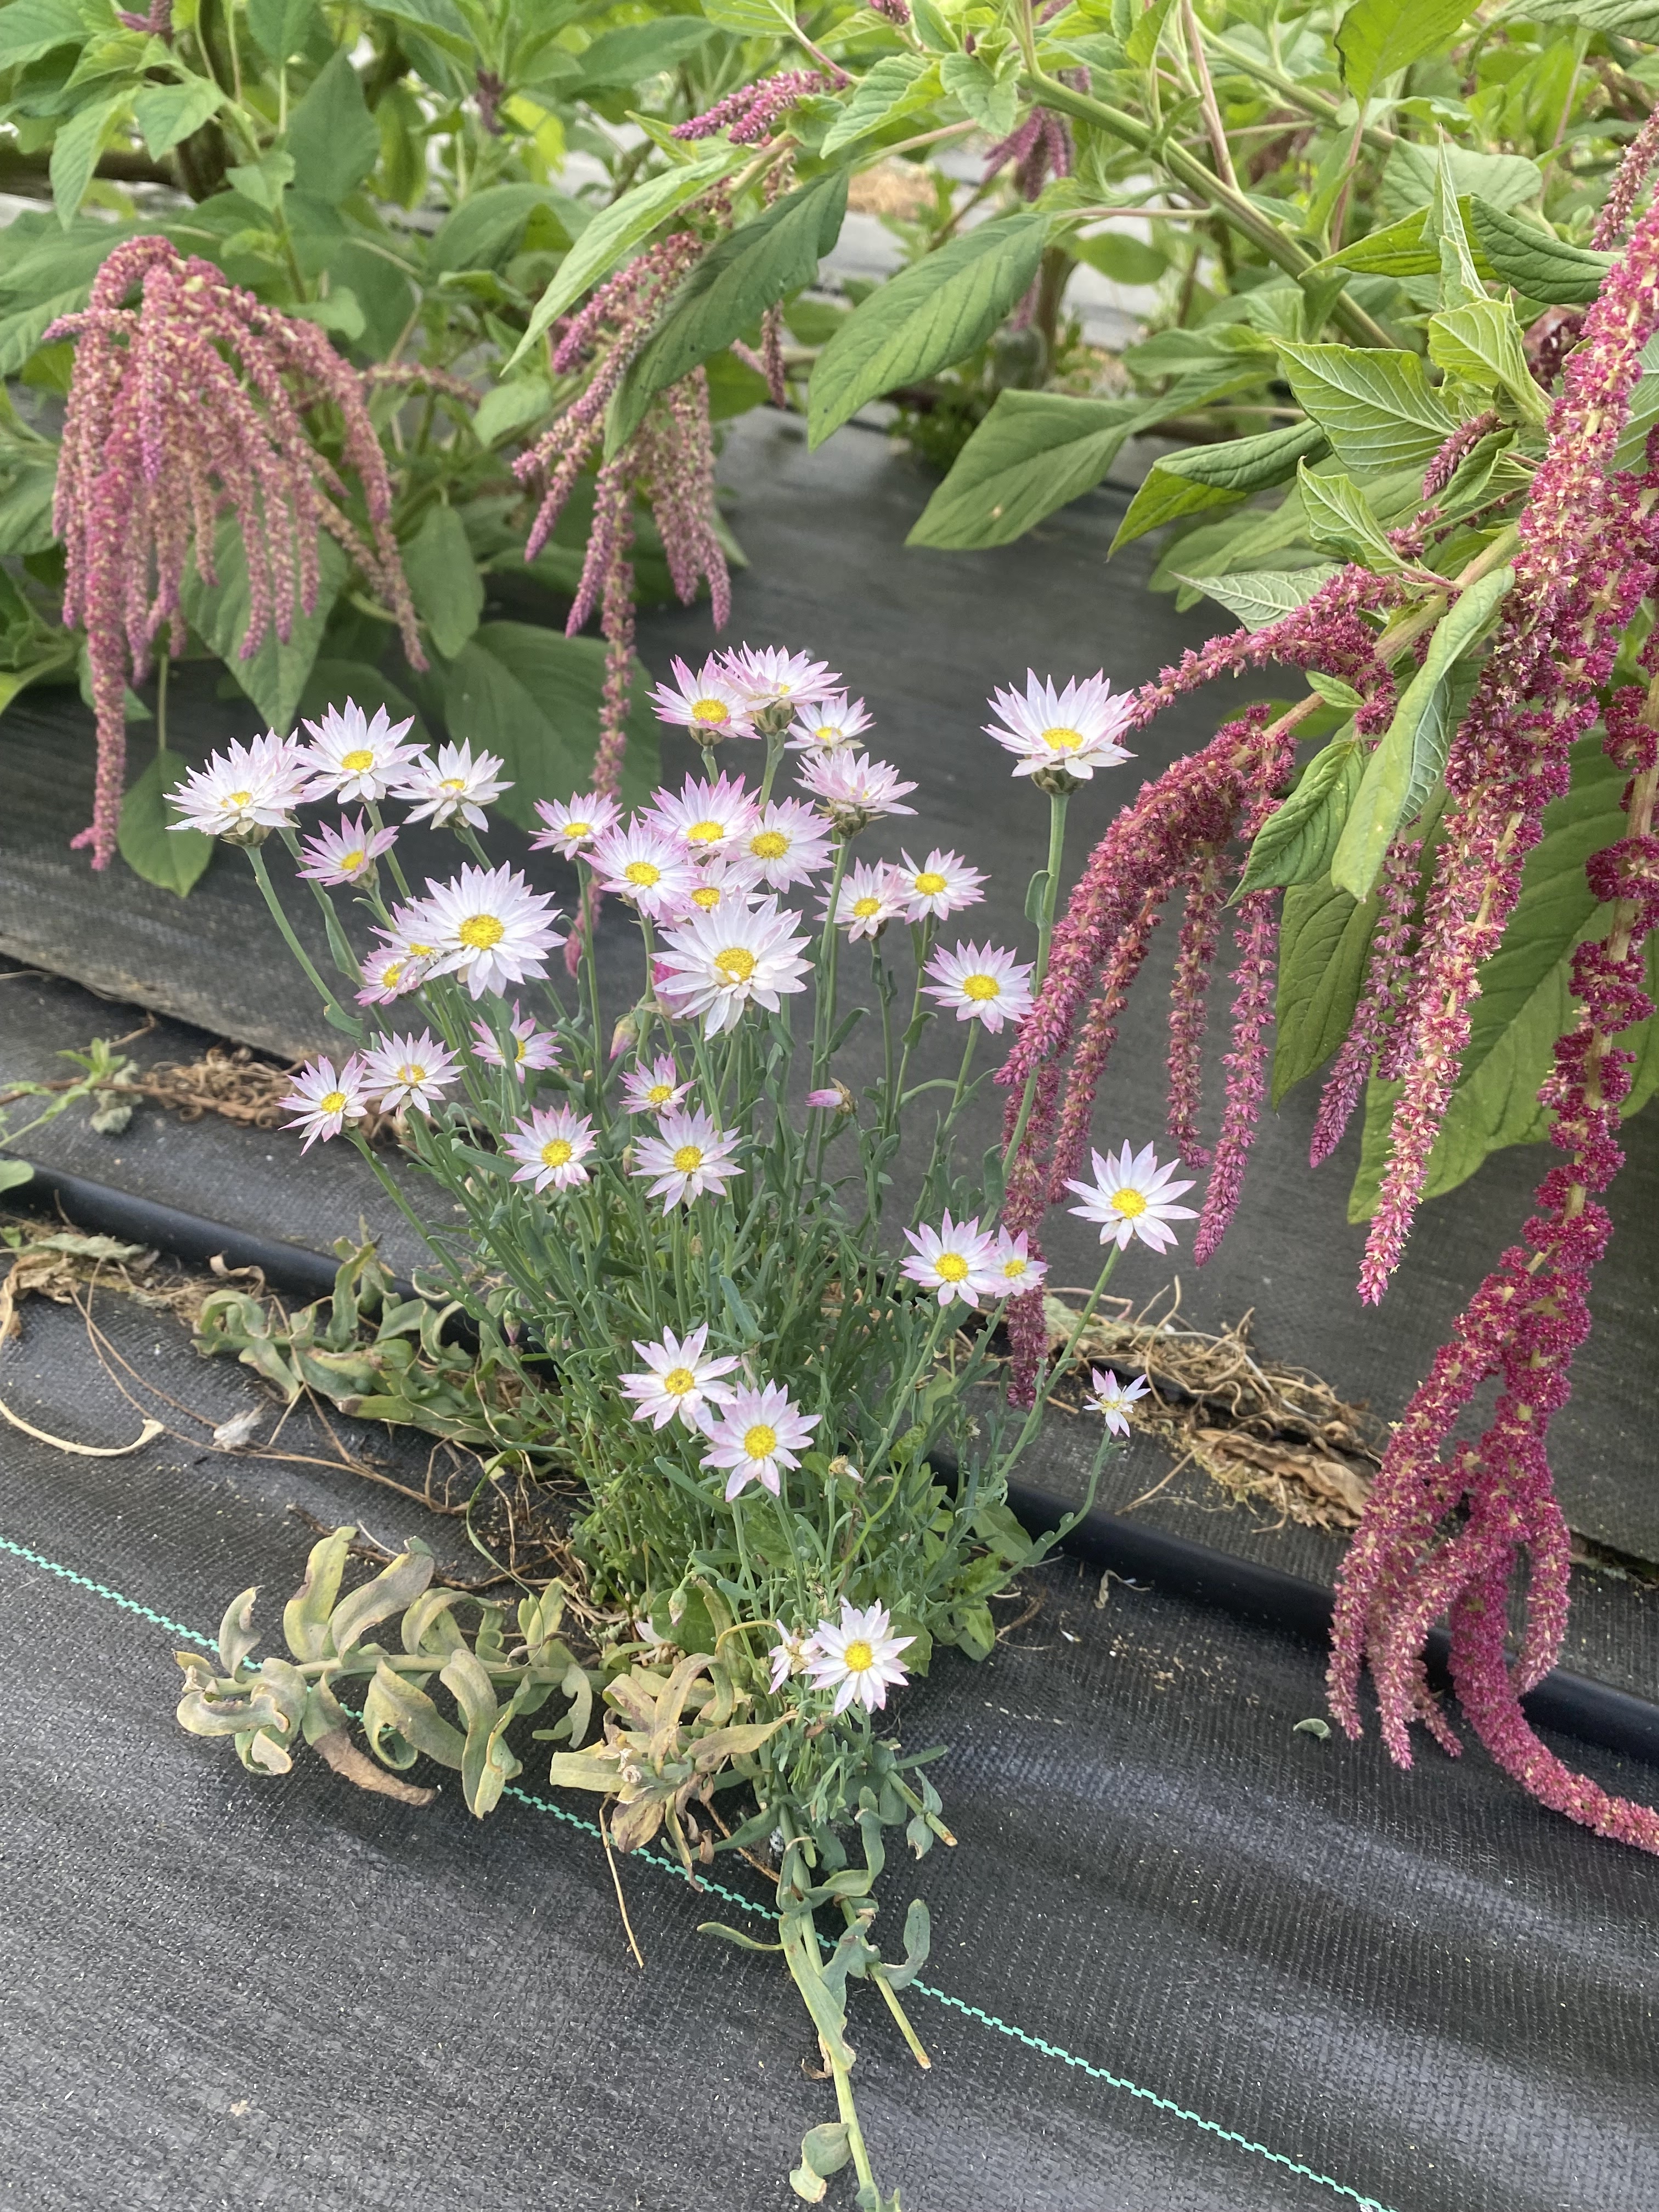
Here is a type of strawflower. It has single flower heads. The plants are pretty small and only about a foot tall. They dry nicely but are just so small I am not sure if they will work well in a larger bouquet but I am going to try and make some smaller ones. 

This is another type of strawflower and it has double flowers and is much larger than the first kind mentioned before this. I like it a lot better and I think it will look nice when dried!

Several of the flowers I planted did not grow. Among those were yarrow, baby’s breath, Flamingo flower, globe thistle and foxtail millet. The foxtail millet did not even germinate so I must have gotten some bad seed.  I was most disappointed that the yarrow didn’t grow because I really like yarrow and was hoping for some pink yarrow plants. 

Of course, the birds, butterflies and bees LOVE all the flowers!


The sunflowers are finally starting to grow too!

I am going to start attempting to put these bouquets together this week.  Wish me luck!  Hopefully, will be back with a garden post in a couple weeks...

Have an eggcellent day!
~Denise