Celebrating diversity and making lemonade...

Celebrating diversity and making lemonade...

Sunday, December 11, 2022

Farm Failures...

 On the Farm

Not everything goes according to plan on the farm.  Poultry feed is expensive so I am always looking for some alternative ways to get protein for the girls and ladies.  Last winter, I tried 2 different ways of doing this...black soldier flies and duckweed and neither one worked!  Let's start by looking at the black soldier flies...

Black Soldier Flies

To begin, let me explain that the chickens/ducks don't actually eat the fly.  They eat the mature larvae.  The flies do not bite and only hang around for a few days to mate, lay eggs and then die.  Black soldier flies are super high in protein...usually over 30% depending on what they are eating.  Another benefit of black soldier flies is that they can eat coffee grounds, manure and decaying vegetable matter...things you normally need to get rid of anyway!  The idea of turning waste products into protein and calcium rich poultry treats is tempting!  I bought a special bin to grow the black soldier flies.  
Then, I purchased some larvae..they are the small white things.  They are about the size of rice...
Inside the bin, I started with putting in some soaked corn, oatmeal and a little compost to get the larvae started...you can see the ramps at the bottom of this pic on either side of the oatmeal...more on that in a bit...
I placed them in their "food" and then covered them up so they had a little privacy...also, they like it dark...and they can lay their eggs in the burlap.  I also put some cardboard in for them to lay eggs inside the corrugation...
They LOVE moldy old vegetables!
The larvae grew and then when it is time for them to pupate, they head to the surface and crawl up, up, up...the bin I was using had a special ramp (see in one of the previous pics) that the larvae could climb up and then they would fall into a bucket and I could take the bucket out to the chickens and ducks.  Yes, they are self harvesting!  It just does not get any better than this!  At least, that is how it was supposed to work...
...some of the pupae did climb out and some became adult flies.  BUT it seems that the adult flies did not mate to lay eggs!  Obviously, the life cycle could not continue.  I don't know why they would not mate.  I thought it might be too cold for them.  In the summer, I took the bin outside and I noticed several black soldier flies in the bin!  I was hopeful that I may be able to get the bin started and then bring it back inside for the winter.  BUT they never laid any eggs either in the summer!  I have not had a lot of time to troubleshoot this.  I did read in one article that light intensity has to be at a certain level.  I also read that they need a good amount of humidity which is something we do not have here in north Idaho (but as long as you keep their feed wet, that should be good enough).  IDK...not sure when I may try this again...if anyone has suggestions, I would be happy to hear them!

Duckweed

Another idea I had read about is growing duckweed.  I read that it is SO easy to grow and doubles in volume every few days.  It is also high in protein (30-50%).  It can be invasive so I planned to grow it in one of the duck swimming pools.  
I ordered it in the winter and kept it out on the garden porch with the fodder system but it did not seem to be thriving at all.  I thought maybe it just too cool out there and put a heat pad under the bucket but it just limped along.  I kept it going so that I could put it in the small swimming pool in the summer.  I thought surely with the warm summer days it would just take off!  BUT still nothing!  As with the black soldier fly system, I have not had much time to troubleshoot.  I did read that it likes high fertility and I did not add anything to the water so maybe that was the issue...it was such a miserable failure that I did not even keep any pics of it!

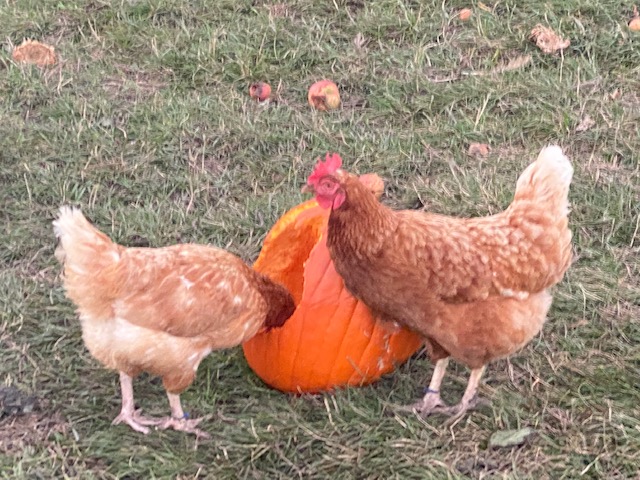
If anyone has tips about growing black soldier flies or duckweed, please let me know.  Most all the articles that I read online talk about how easy it is to grow both of these things but I failed miserably at both!  Luckily, we don't NEED the black soldier flies or duckweed but just thought it would be a nice addition to the fodder, sunflower seeds, pumpkin, dried flower/herbs and other treats we offer to the girls and ladies.

Have an eggcellent day!
~Denise


Sunday, November 27, 2022

Elderberries

 On the Farm and in the Neighborhood...

I really like elderberries!  Each year I love them more!  I know people are crazy about huckleberries but elderberries are flavorful, nutritious, and more abundant.  They can be grown in your yard and they also grow in the wild and are easy to pick!  I can pick a gallon of elderberries in a couple minutes and it usually takes a couple hours to pick that many huckleberries.  We have 2 elderberry bushes on the farm.  They are loaded with flowers in the spring and they smell amazing!  However, for some reason, we don't get a lot of berries.  Luckily, I know where there are a few bushes around town and I forage from these bushes.  
I see elderberries is two colors, black and blue.  The bushes we have on the farm are blue.  I see blue ones in town a lot and black ones on the mountains.  Because of this dark purple color, the elderberries contain very high levels of the antioxidants.  The high antioxidant activity decreases inflammation and improving circulation. 

Elderberry’s are also known for its ability to ward off viruses.  This comes through the action of a potent antiviral component, antivirin, which affects the properties of viruses, preventing them from entering cells in order to replicate.  Elderberries are loaded with Vitamin C too so an elderberry syrup defeats the common cold with a one-two punch.

IMPORTANT:  Raw berries are NOT eaten intentionally because they contain a cyanoglycoside that can cause illness.  Heating/cooking the berries is a safe way to prepare them.  Usually, I am juicing the berries with my steamer juicer so the high heat deactivates the cyanoglycoside.

The elderflower also has medicinal properties and can be made into a tea or steeped to make a sweet, floral syrup.  This elderflower syrup is popular in Europe and people add a little of the syrup to seltzer or club soda and drink in the summer.
The flowers can also be dipped in batter and fried...kind of like an apple fritter.  Yum!  I did make some Elderflower Jelly and it turned out great!  Sometimes, the floral jellies do not have much flavor but this one did not disappoint.  Will definitely be making this one again...
I make jelly with elderberry juice and I add a little sugar to the juice to make syrup and add that to the lemonade to sell at the Farmers Market.  The jelly is one of Henry's favorites.  I do have some "medicinal" elderberry syrup that I made for us to take when we feel some sickness coming on.  
There is some for sale in the online store too!  Whenever I hear Mark start to cough, I start giving him some of the elderberry syrup several times a day.  I would actually like to try making some elderberry wine at some point but I will need a lot more elderberries.  I do add some of the syrup to my homemade kombucha and it is delicious!

Have an eggcellent day!
~Denise

Sunday, November 13, 2022

50th Anniversary Celebration!

 In Kansas...

The end of October, our whole family headed to Kansas to celebrate Denise's parents 50th Anniversary.  Technically, their anniversary is not until November 25th, BUT they were celebrating with 2 other couples so that it would be one big party!  The couples all got married in 1972 and are good friends.  We started the festivities with a mass.  Two of the couples have children that are priests.  Here is Fr. John leading the couples in a renewal of their wedding vows.  Fr. John was in my class in school growing up so I know him well.  It is a small community so I know a lot of people there...naturally...
The happy couples take a pic after the Mass.  My parents the middle couple...Dennis and Terry Klenda...
Here is an invite that went out before the event and the pics of the happy couples on their wedding days...

After the mass, each family had their own dinner and then we met at the Community Center in town for a cake cutting ceremony.


You can watch a video of the cake cutting here:

Here is a pic of my family...from left to right...Denise (me), Tyler (brother), Dennis (father), Terry (mother), Dale (brother) and Darlene (sister).  Joshua took this pic for me so that is why it is a little crooked...
Then, cake was served to everyone!  Here is a pic of my brothers serving the cake and being goofy...
Then, the polka dance began!  The couples had a dance first and you can watch that here:
More dancing fun! And an open bar!  It was a great event!  The name of the polka band was called Barefoot Becky and she really did play barefoot all evening!  They came down from Iowa!


So grateful to my siblings for organizing this event with the other families.  It was a crazy amount of work and I felt pretty useless being several hundred miles away.  I was so happy to see some cousins that I have not seen for years and my aunt for Pennsylvania flew out for the event too.  A wonderful family came to take care of all the girls at the farm while we were gone.  It was so nice to not have to worry about that while we were having fun in Kansas!

Have an eggcellent day!
~Denise

Sunday, October 30, 2022

Chicken Pumpkin Challenge

 In the Paddock

Had some fun letting the girls make a jack-o-lanterns!  This is part of a Chicken Pumpkin Challenge that has been going around on Tik Tok.  You scrape off a bit of the pumpkin where you want the chickens to peck and then let them create their own jack-o-lantern.  Here is the pumpkin with a little bit of the face scraped off...
The girls in the east coop dived right in and started pecking away...they even made their own holes in the back of the pumpkin!

They got one eye done so I took the opportunity to pull the pumpkin out of the paddock and grab a quick pic...
The girls were anxiously waiting for me to give them their pumpkin back...they ended up eating the entire pumpkin in just a few hours!
Here is the pumpkin in the west coop...they took a couple of days to get their jack-o-lantern completed...
Jack-o-lantern in the west coop...
I put the jack-o-lantern back in and they did a little more work on it...

So...just a little Halloween fun on the farm!

Have an eggcellent day!
~Denise

Sunday, October 16, 2022

Stew hens!

 In the Coop and Kitchen

The time had come to retire several of Mark's first hens that he bought to start his egg business.  I always knew this day would come and was not looking forward to it.  We did our best to make lemonade out of lemons and held a butchering class for people in the community.  Five people came and learned how to humanely kill, scald, pluck, and eviscerate a chicken.  
Everyone that came to the class got to take 2 stew hens home.  Then, we still had a few left so I put two stew hens in a bag and let them "age" in the cold room for several days before putting into the freezer.  They are for sale now in our online store! 
Next was to figure out how to to cook these ladies.  I have made bone broth several times but never cooked a stew hen.  Since these chickens were almost 3 years old, you can't just roast, bake or fry them.  The meat would be too tough for that type of cooking.   You have to cook them over low heat with lots of liquid - to stew them.  As muscles get older, they develop lots of connective tissue so the long slow cooking time is needed to break that tissue down, which in turn flavors the broth.  I decided to try two different methods of cooking.  

Method 1 is the Instant Pot:  I put one stew hen in a instant pot, added carrots, celery, and onion,  4 quarts of water and a splash of apple cider vinegar then pressure cooked it for 90 minutes.  I basically followed the information in this post: How To Cook Stewing Hens In Pressure Cooker  I did not add the spices that were featured in this blog post.  I like to keep the chicken broth neutral and add spices when I use it in a recipe.

Method 2 is the Crock Pot:  For the crock pot method, I just put the stew hens in the crock pot like I do when I make chicken broth from bones.  I put them in the crock pot (I was able to get 2 stew hens in the crock pot) and added celery, carrots and onion.   Another important thing that I included in both methods was a tablespoon of vinegar.  This helps to get some of the minerals out of the bones. 
I turned the crock pot on low and let it go overnight.
I strained off the broth and then let the hens cool down so I could pull the meat off the bones.  I got almost 2 cups of meat from one hen.  One thing I noticed is that the dark meat was very dark and the fat was very yellow!  While stewing hen meat is a little chewier, not as plump and juicy as young chicken, it has SOOOO much more flavor.
I chopped up the meat and used it to make enchiladas and they were great!  Since I had done 3 stew hens, I even had some extra meat that I put into the freezer to use in maybe a taco soup later this winter.
Here is a pic of the chicken enchiladas!  
I wanted to include a couple more links to information about cooking stew hens that I found useful:
How to Cook a Stewing Hen - this blog has links to some recipes on how to use the meat

After pulling off all the meat, I put the bones back into the crock pot and added some chicken feet (yes, I saved a few feet...they are GREAT for making broth) and let it go again over night.  I ended up canning up about 15 quarts of broth!
I prefer to the crock pot method.  Most likely because I am used to making bone broth using this method.  The instant pot is clearly faster but I don't mind waiting and the house smells amazing!
This is a great way to honor these ladies for the years of service that they provided.  We appreciate their service to Mark's egg business!

Have an eggcellent day!
~Denise


Sunday, October 2, 2022

Nest box woes and wins! Got Straw bales! Yeah!

 In the Coop

When the new chicken coop was finally completed, we were so "eggcited" to put the fancy rollaway nest boxes into there.  We got them mounted up right away and they looked so nice!  One of these extra large nest boxes is good for 70 chickens and that is about what we had in the coop so this was perfect.
Unfortunately, there were some problems with the fancy rollaway nest boxes.  First, the girls really did not like using it.  It is hard to explain but I could just tell.  Then, I started noticing that there were fine, hairline cracks in the eggs.  I would say that at least a dozen eggs a day would have these cracks and you can't sell eggs with cracks!  I called the manufacturer and explained the issue.  He asked if the boxes were level.  I said that they were mounted in the chicken coop and that the coop was built on a concrete pad.  I was not quite sure what he was asking.  Then, he explained that the eggs were coming down into to the collection area too quickly and to make sure the nest box was level.  Henry and I added some wood to the bottom of the box to help level it out but this seemed to continue to be an issue...
THEN, the worst thing happened.  The girls figured out how to stand in the nest box area and put their heads down into the collection area and eat the eggs!  I wish I had taken a pic of this but it was too upsetting for a pic.  I would open up the egg collection area and there would be a bunch of eggshells with holes in them.  One day I counted 15 eaten eggs!  I tried to punish the hens that were eating the eggs.  There were about 3 that figured out the system.  I would put them into the quarantine cage but as soon as they were let back out, they went right back to it.  It was like a game for them.  Once a chicken learns this type of behavior, it is really hard to detour.  The whole idea of the rollaway nest boxes is that the eggs rollaway so that the chickens can't get to them!  

We decided to just purchase some regular old nest boxes and put them up around the coop.  This seems to work fine...
...AND even though the eggs are just sitting right there...out in the open...no one eats them!  It is somewhat bizarre to me but I am glad it works.
So, one reason I could not get around to writing some blogs this past summer is that I spent a lot of time working through the new forever flowers, feed and nest box issues...hoping we are on a good path at this point.  Also, there has been a serious shortage of small straw bales.  We got one load of straw bales last fall and I was confident that they would last until the summer.  Boy, I was way off.  The girls and ladies use a lot of straw!  This past week, I found a local farmer that had small straw bales and we got some!  Yeah!  This time we got 2 trailer loads!
Ollie, the cat, helped us unload the straw...you almost can't see him...he is "straw" colored...LOL...
...and put into the barn!
It has been a crazy summer season and now I am happy we have:

Straw in the barn for the winter!  
A great new feed dealer!  
And hens laying eggs in their nest boxes and not eating them!  

It's the simple things!

Have an eggcellent day!
~Denise


Sunday, September 18, 2022

Feed woes and wins!

 On the Farm

Sometimes things just don't go according to plan...We knew that there would come a time that we would need to get poultry feed in bulk.  When I say "bulk", I am talking about tons of feed at a time.  If you go to the local farm store, you can buy 50 pound bags of feed.  We would go through a 50 pound bag of feed each day with all the ducks and chickens that Mark has.  We were buying 40 pound bags of feed from a local farmer and we were getting like 25 bags at a time.  This would last about a month and this is when Mark had 70some chickens and 40some ducks.  Since that time, we have added another 70some chickens.  The point is that this a lot of feed to move around by hand!  I started researching about feed bins and got in touch with a lady on a local Facebook homesteading group.  She sells feed and I was asking her about how she gets the feed and sorts it out for people.  She also had an egg business at the time, but has since sold her egg business.  She had a big portable grain bin and this seemed like a good way to go for buying feed.  She gave me the name of the individual that she purchased her feed bin from.
Three ton portable feed bin

Luckily, he was located in Post Falls, Idaho which is a couple hours north of where we live now.  We contacted the individual and set up a day and time to go and pick one up.  I also asked if he knew of any place where we could go and take it and get it filled!  He gave me the name of 3 local grain mills and I made some calls.  One of the mills was "kind of" on the way home so we set it up to get a ton of feed from them.  The portable feed bin holds 3 tons of feed but we could only afford to get one ton at the time.  I am going to call this first grain mill the "Valleyford" grain mill from now on (because it was located near a town called Valleyford).  
Filling the feed bin at Valleyford

There is a local grain mill that is only about 15 miles from our home.  BUT they are so popular that they have a wait list to get in and purchase feed from them!  We got on the wait list in January when we got our feed bin.  However, we were going to have to do something else in the meantime.  The individual that we were purchasing feed from in 40 pound bags stopped providing feed.  I literally got a text message from him while driving home with the new feed bin saying that he was getting out of the feed business.  Talk about timing!
Feed going into the feed bin

Okay...we got home with the grain bin and the feed.  This one ton would last about a month.  The Valleyford feed mill was 1 hour and 45 minute drive...one way!  I had been talking to another farmer that sells feed and they were much closer...about 40 minutes from our home.  It was a little challenging to work with him and he didn't always have feed but at one time it finally worked out that he had feed available and we needed some.  We headed out there to get a ton of feed.  We will call this one the Colfax grain mill.  The feed looked different and it had garbanzo beans in it.  They kept going on and on about how it was such good feed.  Colfax grain mill was cheaper and closer than the Valleyford feed mill so we decided to give it a try.  We brought it home and almost immediately, I realized that it was probably NOT even chicken feed.  No one would eat it...not the chickens and not the ducks.  They hated the garbanzo beans!  AND I don't think there was any minerals in it because we started getting soft shelled eggs.  I have no idea what they sold us but it was not good...and we had a ton of it!
The cats were very curious about the grain bin when we brought it home.

Shortly after getting this bad feed into the bin, I noticed another new local feed mill in our area.  It might sound odd but as the feed goes into the bin, the feed on the top actually get pulled through and comes out the bottom into the bucket first.  I say this to tell you that I had a great idea of putting some "good" feed on top of the bad feed and then it would "mix" together to kind of dilute the bad feed  as it came out the bottom of the bin.  We will call this one Garfield grain mill.  I asked what the price of a ton of feed was and it was a good price!  It was also fairly close...about 40 minute drive one direction.  We headed out and got the feed.  Then, we got the bill.  It was TWICE as much as I was expecting!  I think I even felt my heart skip a beat.  I almost wanted to cry...it was WAY more than we could hardly afford.  I asked for clarification.  See...I had asked for the price of a ton of feed.  She had replied with the cost of 1000 pounds.  If you didn't know, a ton is 2000 pounds.  SO...I thought I was getting a great deal on a ton of feed but it was only half of the price.  Does that make sense?  It was totally a miscommunication.  I just assumed that when I asked for the price of a ton of feed that she was giving the the cost of a ton of feed but her text clearly says 1000 pounds is $X amount.  It was super great feed but just way too expensive.  Like several hundred dollars more expensive than Valleyford grain mill.

We finally got through all the bad and expensive feed then needed more feed, naturally...the chickens and ducks want to eat every day...who knew.  We went back to Valleyford grain mill even though it takes a couple hours to drive there, an hour for the feed to load into the bin, and then a couple hour drive back.  It makes for a long day.  We even almost got into a super bad accident on the highway on the way there this time.  It is a little hard to explain but we had been following a truck hauling a boat for most of the way.  All of a sudden, I see them pull over onto the shoulder...remember, we are all driving 60 MPH.  The reason he hit the shoulder is because there was a truck stopped in the highway wanting to make a left hand turn in front of him.  I was trying to decide which one I wanted to hit because we were going WAY too fast to come to a stop.  I decided it was best to hit the boat but then at the last second I decided to go into the lane of the oncoming traffic.  LUCKILY, the car in the oncoming traffic realized what was happening and had pulled over onto their shoulder.  So, I flew through going about 40 MPH and we were all lined up 4 vehicles across the highway.  Then, the truck with the boat pulled in behind me and we just all kept going like it was supposed to happen that way.  My heart was pounding like a hundred miles a minute and I just could NOT believe that we didn't hit someone!  
A throwback pic of Mark feeding chickens!

Okay...back to the feed...the first batch of feed we got from Valleyford grain mill was ground up very fine and it kept getting like "stuck" in the bin.  I would have to open the top and climb up there and knock it down with a hoe.  Remember, this is back in the winter when things are cold and icy.  I did not like having to climb up the steel ladder and try to knock the feed down while balancing and trying not to fall down 10 feet to the ground below.  I asked if they could do a more course grind, hoping that it would flow out of the bin better and they were able to do that and it worked great! 

In late summer, we needed more feed and we went back up to Valleyford grain mill and I asked for the course grind.  Unfortunately, this time, the feed did not get ground up enough and we ended up with a lot of whole peas in the feed.  The poultry cannot eat whole peas so there was quite a bit of waste in this batch.  The whole peas would plug up the feeders and it was a mess.  You can see the peas in the bottom of this feeder...

I was going to have them just grind it up fine again the next time BUT WE FINALLY GOT THE TEXT THAT WE WERE OFF THE WAITLIST AT THE LOCAL GRAIN MILL!!!  This is such a blessing!  We can drive there, get the feed loaded and drive back home in less than an hour!  AND...it is the BEST feed!!!  The girls and ladies all LOVE it!  So happy!!!  Here is a close up of the feed that we have now...it is perfectly ground...
I know this blog has been a bit of a rant...who knew that getting feed for poultry could be so challenging!  I thought we were going to have to start our own grain mill business!  I hope this local grain mill never goes out of business!!!  I know there are lots of exclamation marks in this post too!!!  BUT we are SO happy!!!

Have an eggcellent day!
~Denise