Celebrating diversity and making lemonade...

Celebrating diversity and making lemonade...

Sunday, November 4, 2018

Getting the bees ready for winter...

Beekeeping

It's time to get the beehives ready for winter.  I have two different hives - a top bar hive and a (traditional) langstroth hive.  I have been checking the hives on a pretty regular basis this fall and both colonies have decreased in size.  This is to be expected.  The hive will shrink down to a cluster the size of a large grapefruit.  Although the temperature outside may be freezing, the center of the cluster remains a constant 92 degrees F. The bees generate heat by “shivering” their wing muscles.

One thing that can harm bees in the winter is condensation in the beehive.  As you can imagine, if it is 20 degrees F outside and 92 degrees F inside the hive then where that heat meets the cold, there can be some condensation forming.  Water may form inside the hive and if it drips on the cluster, it will be deadly.  By adding a layer of insulation on top of the hive, it can help with moderating this effect and absorbing the moisture.

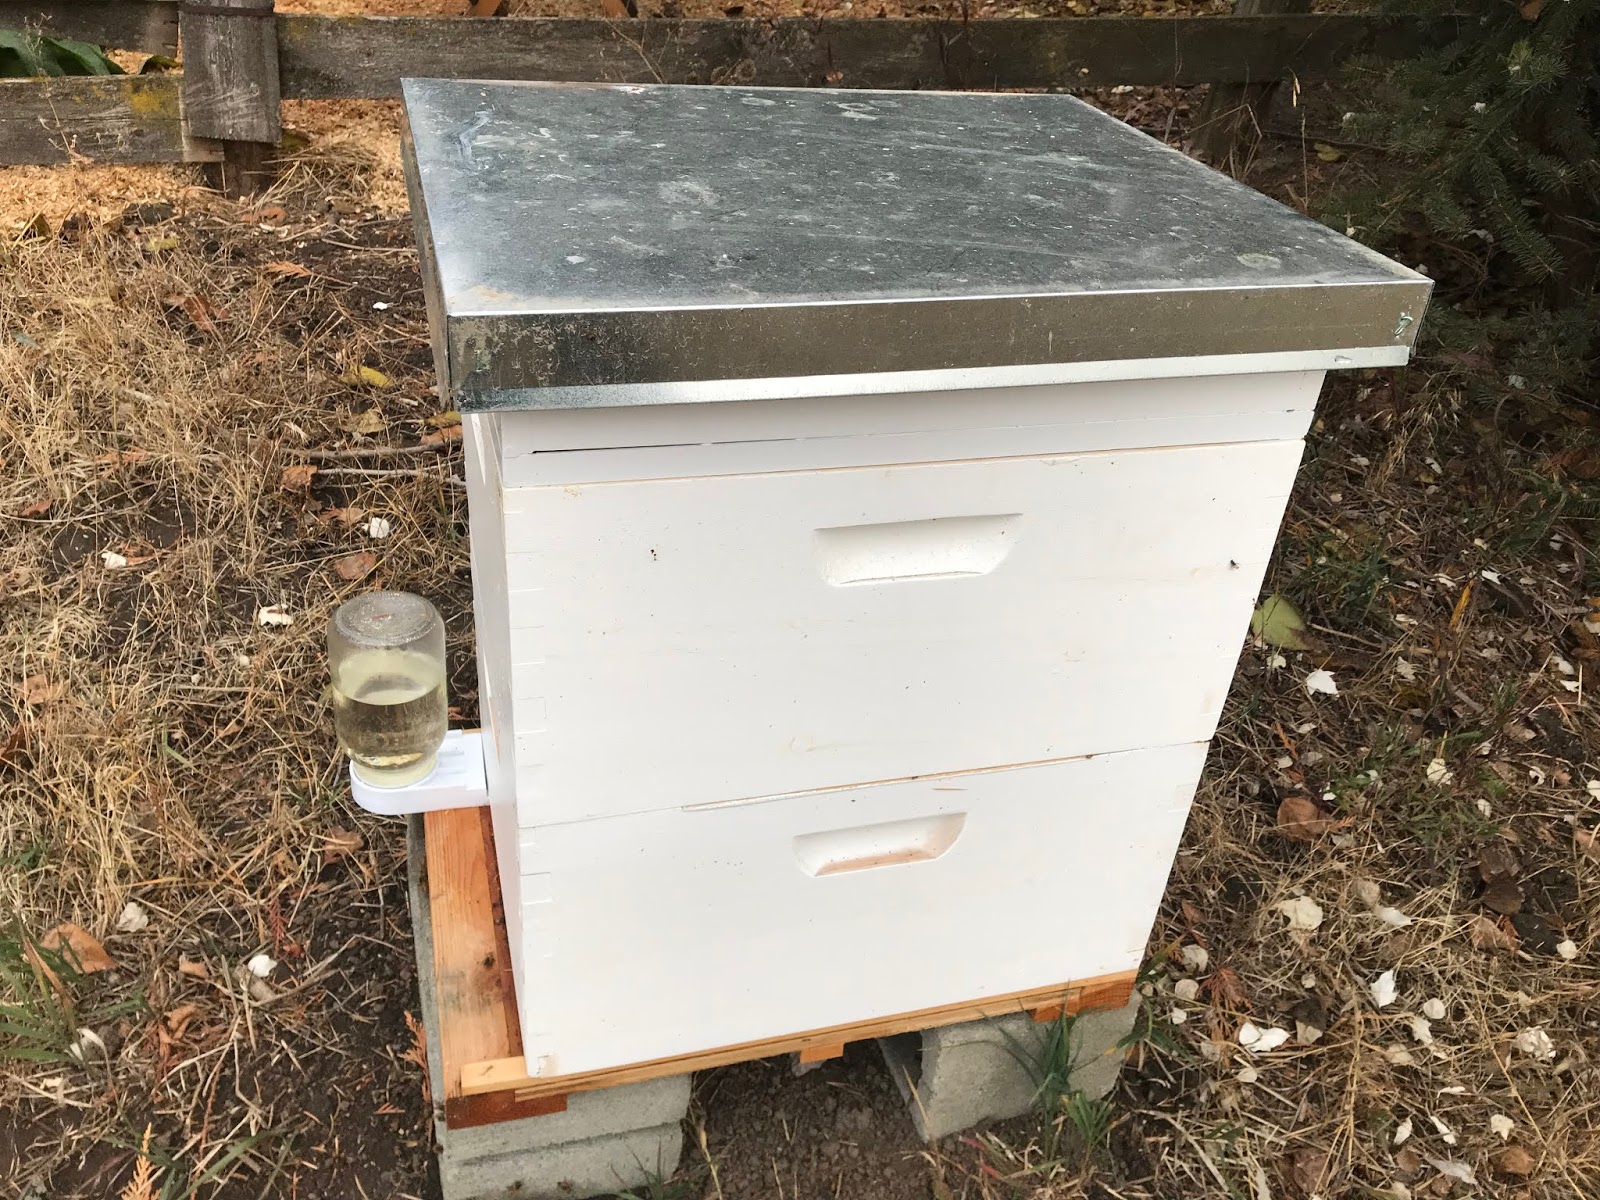
When temperatures warm into the 40's and 50's, the bees will slowly move the cluster around to get to the honey to eat and keep up their energies.  That is why it's so important for there to be a good supply of honey in the hive for the winter.  I have been feeding my bees sugar water since the end of August to make sure they have enough honey in the hive for the winter.

This is my third year of having the top bar hive.  The first year, my bees did not make it through the winter.  This past year they made it!  The hive just exploded with new bees in the spring and then swarmed because it was too crowded for everyone.  I caught one of the swarms and put it into a langstroth hive. 

I have never done anything to overwinter my top bar hive in the past.  This year I heard that you can put some insulation in the top.  So, I grabbed some old burlap sacks out of the barn and cleaned them up and layered them on top of the bars in the hive...
 Then, I closed the lid.  That was easy!

For the langstroth hive I added a quilt box to the top of the hive.   First I took the inner cover and top off of the hive.  Last time I looked in this hive the bees were in this middle section that you can see in the picture.  You cannot tell it but I also added some follower boards on either side of the bees to make the space smaller so it is easier for them to heat it up in there.
 Then, I added the quilt box.  It has a screened bottom.
 On top of the screen, I added some wood shavings.  This is to help in moderating the temperature and absorbing any condensation that may occur.
 Then, I replaced the inner cover...
 ...and put the lid back on the hive.

Now, we cross our fingers and hope for the best.  I really have no idea if either hive will make it through the winter...time will tell! 

~Denise

Sunday, October 21, 2018

Growing mushrooms

In the Garden

I have been wanting to start a mushroom patch in our garden for a while.  I had heard about growing King Stropharia mushrooms in a podcast a while back.  They are also sometimes called wine cap mushrooms.  They are easy to grow and are prolific.  I ordered my spawn (that is what you use to inoculate your patch - it is like seed) in June.  I had a special place under some trees that stayed pretty shaded that I used to place the spawn.  You put the spawn out in wood chips and water, water, water.  

It is important to keep it all moist for the first couple of weeks.  The suggestion that came with my spawn was to water 15 minutes every morning and evening for the first 2 weeks.  Of course, we did not get much rain this summer so I continued to water on a regular basis.  

At the end of July, I started to wander if all my watering was even paying off.  It's not like a plant that you can see growing above ground.  So, I pulled back some of the top wood chips and saw the mycelium...it is hard to see in this picture but the mycelium is the whitish threadlike/stringy stuff...

 Now, I knew that my spawn had spread and was alive.  I kept watering and waited some more and then one day in August I saw baby mushrooms starting to come up...

Then, the mushrooms got bigger.

More mushrooms grew!  They were almost all in the middle of the patch.  I think this area got the most water from the sprinkler that I had on them so maybe that is why they grew best in the middle.
I didn't actually pick any of this first batch.  It was fun to see them grow.  They grow rapidly once they get started.  A couple of weeks ago (it is October now), three more grew along the edge of the patch.  

I am going to put some new chips on top of the patch soon.  Then, next June, I am going to take some of the chips and use it to inoculate a different area.  The directions that came with the spawn said to put it in a shady spot.  I have also read they they can tolerate partial sun so maybe I will get more mushrooms in a sunnier location.  Also, I am curious if we would get a lot of mushrooms in the spring because that is when you usually see a lot of mushrooms growing in this area with the spring rains.  It has been an unusual fall...we have not had much rainfall at all.  It has been hard to know if I should keep watering my food forest and herb garden.  Today, the temps got up into the 70's...that's unusual for this time of year.  I watered my lettuce, spinach and overwintering onions.  Don't misunderstand, I am not complaining about the temps!  I worked on my compost bins today and still have a LOT of cleaning up in the garden area to get done!

Here is a nice collection of blog posts all about King Straphoria mushrooms.  

A fun fact for you taken from Wikipedia:  In Paul Stamets' book Mycelium Running, a study done by Christiane Pischl showed that the king stropharia makes an excellent garden companion to corn. The fungus also has a European history of being grown with corn.  Maybe I should try inoculating my corn patch next year...

~ Denise


Sunday, October 7, 2018

Food Forest

Food Forest

I started a food forest along the fence back behind the garden.  A food garden/forest as defined by Wikipedia is: a low-maintenance sustainable plant-based food production and agroforestry system based on woodland ecosystems, incorporating fruit and nut trees, shrubs, herbs, vines and perennial vegetables which have yields directly useful to humans. 

There are 7 layers to a food forest and even more if you start to count mycorrhiza (fungal/plant) interactions.

I will be the first to admit that I do not have all 7 layers in my food forest.  I do not have vines or root crops (actually, I forgot that root crops should be a part of a food forest)! 

Here is a picture of the food forest in May.  Everything was so small and I thought it would never fill in but things did grow nicely as you can see in the video below.

The plants in a food forest are chosen to benefit each other.  Some are nitrogen fixers, some are dynamic accumulators (pull up nutrients from deep in the soil and bring them up to the surface), some are to attract pollinators, some are to detour pests, some provide shade and some provide food!

Here is a quick walk through of my food forest:

Here is a nice article about forest gardening.  It would be fun to have a food forest around the perimeter of our property but that would take a LOT of work but could be a goal for the future...I like the idea of mixing beneficial plants together and I have SO many more trees I want to add to the property.

The past couple of weeks I have been putting wood chips down on the food forest.
~Denise


Sunday, September 23, 2018

Summer recap 2018 and garden lessons learned...

In the Garden

Our first big garden and there were lots of lessons learned:

The wind can do more damage than the cold/hot temperatures.  
I didn't realize how damaging the wind can be.  In the spring, I was so concerned about cold temperatures and the possibility of a freeze wiping out plants that I had planted early.  BUT the wind can do more damage with knocking plants over that do not have a well established roots system.  Also, the wind can dry things out quickly which can be damaging to the plants.

Seedlings this past spring waiting to go out and be planted in the garden.
Water, water, water is so important.
In north Idaho, you HAVE to have a plan for watering.  The past 3 months, we have had 1 rain of about 1/3 inch.  In August, we had a few days where it got up to 100 degrees.  I implemented some drip hoses and I will need to buy more for next year.  This was a bit of an investment but it will pay off in the long run.  I need to figure out a better system for watering the raised bed stock tanks.  I have an idea already...

Over plant and then thin...seed is cheap but losing 2 weeks of growing weather is expensive.
I was a bit stingy with the seed when planting.  Then, the slugs came in and ate most of the small seedlings.  So, next year, I will plant more and then thin out (or let the slugs thin it out).  The growing season is so short here that you don't want to have to start over.  I am also going to start looking for and buying the shortest season plant seeds I can find.

Slugs are the worst! 
For such a dry climate, I could not believe how many slugs I had eating my sunflowers and lettuces and anything else they could get to (this was mostly in the spring)!  I am going to have to be more proactive about the slugs next year. 

Here is a pic of the celery that I am blanching (that is why I have the paper bags around them).  I harvested them yesterday and cut up put in the dehydrator.  What you can't see is that I had to throw away over half of the celery due to slug damage.  I still got a lot of celery but will set things up differently next year...

I will need to grow a LOT more if I want to preserve things!
We did fine with providing vegetables all summer for our family.  We had fresh spinach, lettuce, beets, green beans, broccoli, cabbage, cauliflower, celery, summer squash, tomatoes, eggplant, potatoes, onions, garlic, corn and peas during the growing season.  This was our first attempt at having a large garden and I was a bit limited on the planting space since I was mostly using the hay bale gardening.  I think once we have the raised beds up and going, we will have a lot more space to plant in them.  Henry built a couple raised beds already and I am just shocked at how much growing space there is (compared to the top of a hay bale).  I did get to dehydrate a few things and I will can some salsa and freeze some corn and green beans.
Veggies growing in the top of hay bales.
Sunflower recap
The peach and white sunflowers just did not work.  The bugs just LOVED the peach sunflowers.  I may actually keep planting them strictly to use as a trap crop for the bugs.  As I mentioned previously, I had trouble with slugs eating the seedling.   I made the rows WAY too close together and I have already taken steps to expand the sunflower growing area for next year.  The voles still got in and got a few of the sunflowers but overall the sunflowers did well! 
Vole damage on end of sunflower stalk.
Birds, Bats, and Bees...
It appears that something is using one of the bee blocks I made!  Nothing is in the other bee block.  I will move it to a better location.
I know several of the bird houses that I made were used.  I have not seen any bats.  I think we are going to move the bat house too.

We made some time for fun at Silverwood.  Mark did not want to get out of the wave pool for like 2 hours!
Joshua, Henry, and Mark in the wave pool at Silverwood.
~Denise

Sunday, September 9, 2018

Now that's an Idaho potato...

In the Garden

I decided to harvest my potatoes yesterday.  The potatoes were grown in the hay bales and we have been stealing some out of the bales as we needed them the past couple of months.  Last time I went in to take some, it seemed to me that some of them were starting to sprout.  So, even though the tops had not died back, I decided to harvest the potatoes.  I was pleasantly surprised!

Potato that is way bigger than my hand.
The good thing about the hay bale garden harvesting is how easy it was to do.  I just had to peel back pieces of the hay bale and grab the potatoes out.  No digging.  No accidentally stabbing potatoes with a fork.  No cutting them in half with a shovel. 
 
Potatoes growing in the hay bale.
 I had planted 3 bales and harvested a 5 gallon bucket of potatoes!  This doesn't count all the potatoes that we had eaten before I went in to "officially" harvest.


Another reason that I wanted to start harvesting them is because we are starting to make some raised beds and I needed a place to put them.  Henry made the frame and I put hardware cloth on the bottom.  It is a little hard to see but the bunch of plants at the end of the bed is the last of the potatoes.  As I harvested them out, I just threw the half rotted hay into the bottom of the new raised bed.


As I had noted in my garden post about a month ago, I almost gave up on even growing the potatoes in the bales.  It took me 3 tries to get them going.  I am SO glad I didn't give up on this!  I also have a 100 gallon potato bag.  I harvested that too.  I didn't even get enough potatoes to fill the bottom of the 5 gallon bucket.  From now on, it will be hay/straw bale potatoes for us!!!

Another note...I planted white and red potatoes.  I got maybe a total of 5 red potatoes.  For some reason, they just did not grow as well.  Maybe I planted more red potatoes in my first 2 failed attempts.  I really can't remember.  I will definitely be saving some of these white potatoes for planting next spring.  I also want to try some other varieties next year.  

Now, I am curing the potatoes and then I will store them.  Here is a great article on storing potatoes.

Next project, besides continuing with building the raised beds, is planting these overwintering onions that I started indoors last month...

~Denise

Sunday, August 26, 2018

Video of herb/pollinator garden

In the Garden

Right outside my kitchen, I have planted an herb/pollinator garden.  I have my bee waterer located in here.  I took a quick video of the herb garden this morning...


I like how the herb garden is coming along.  I still have lots of room to plant more.  I am still working on getting shavings down over the hay and I will also put wood chips down on top of that.  I am going to try and dehydrate some more of the herbs this fall.  I have been able to dry some basil, oregano, parsley, sage, feverfew, chamomile, calendula, mint, and catnip thus far.  I want to look up some recipes for herbal teas to make this winter and use the herbs for these teas (and for cooking too).  Now that we are finished with the Farmer's Market for this year and the boys are going back to school, I should have time to focus on the drying.

Another thing that got put on the back burner was the compost piles/bins.  Finally this past week I was able to get in there and turn all of them.  I have 3 big open piles made out of pallets (actually, it is really 4 piles because I ran out of room and had to just dump some grass beside the pallets) and 3 covered bins up close to the house.  The more open piles had gotten pretty dried out and you need moisture for the microbes to do their job.  The great thing about compost is that you can just leave it and it will eventually work down but it goes faster if you can get in there and turn it.  I was able to harvest out 2 garbage cans full of compost!  In addition, I put a good 5 inches of compost in the blueberry raised beds and covered that with shavings.  That should really give the blueberries a boost.

Harvested compost in garbage can.

~Denise

Sunday, August 12, 2018

Straw (hay) bale gardening

In the Garden

I would like to have lots of raised beds in the garden area.  However, it is expensive to purchase all the wood and hardware cloth.  So, I will probably just add a couple raised beds each year.

When we bought the property, there were a lot of old hay bales in the barns.  I decided to try and and do some straw bale gardening.

Let me back up a bit.  Last fall, I laid down cardboard and then put old straw on top of it where I wanted the garden area to be.  The idea was to kill the grass underneath.  At first, I just did one half of the garden.  Then, I decided to go ahead an do the rest.  Here is a picture of the garden area last fall. 


Here is a picture after I laid down all the cardboard and hay.  Also, I have the straw bales place here.  I have 5 rows of 4 bales on the left side and then 15 individual bales on the right side.


Then, in the spring, I figured out a way to get free wood chips delivered to my house from the electric company!

So, then I used the wheelbarrow to move wood chips on top of the hay.


I used the old hay bales we had but the method is really based on using straw bales.  There are advantages and disadvantages to each kind of bale.  It is more than just planting into straw bales.  You have to first condition the bales.  The idea is that you add a high nitrogen liquid fertilizer over several days at the beginning of the season to start decomposing the middle of the bale.  Then, you can plant into the top of the bale once it has cooled down.  I tried to plant some potatoes into one of the bales and then the next day I decided to check the temperature and it was 145 degrees!  So, I basically baked those taters.

It is easy to use a meat thermometer to monitor the inside temperature of the bale (which I should have done before I planted those potatoes).  Not only do you have to take note of the bale temperature but it has to be a certain daily temperature to get the bales to condition properly.  I tried to condition some bales the beginning of April and it did not work well.  It seems that daytime temperatures should be consistently around 50 degrees.

I actually had to re-plant the potatoes 3 times.  I was ready to totally give up on this method for potatoes but then they finally started to take off and they are super easy to harvest!  Love the straw bale gardening for potatoes and will use it in the future.  I also really liked the straw bale gardening for the tomatoes which got some many tomatoes that they fell over.  I am going to have to make a sturdier trellis next year.

I put some soaker hoses on the top of the bales for watering.


Here is a bale with broccoli and chamomile and basil (but it's hard to see the basil under the broccoli).


For the bales that I planted cucurbits in, I used these watering spikes...I planted 16 different cucurbits...mostly squash, cucumbers, and melons.


I am going to call the straw bale gardening mostly a success but there are some things that I think I would just rather plant into dirt.  The biggest drawback of the method to me is the surface area of the bale is so small.  I wish I would have put 2 bales side by side to make more area for planting.  The beets and onions did really well in the bales.  I think I would rather plant peppers, eggplants, broccoli and cauliflower in raised beds.

Here is a recent picture of the garden...


...and a video I made of a walk through of the garden...and a huge beet that I pulled out!


I am getting this blog out late because I spent the morning making pickled beets, kvass, and quick pickled beet stalks (the stalks are actually quite tasty!)


~ Denise