Celebrating diversity and making lemonade...

Celebrating diversity and making lemonade...

Sunday, April 10, 2022

Spring seed starting...cold frames...

 In the Garden (soon)...

We have a new big surprise coming to the farm but it did not arrive when it was supposed to!  It should be coming this next week...fingers crossed...  Since the new surprise is not happening yet, I thought I would spend a little time explaining how I start seeds for the garden.  I like to start seeds indoors and then harden them off in a cold frame outside.  

To begin, I start the seeds in the Stack and Grow Light system that we purchased from Gardener Supply.  I have purchased seedling heated mats to put under the plants so the soil is warmed up so that seeds will sprout.  Here is a pic of the Stack and Grow...it was not cheap but we purchased it over 3 years...3 years of Christmas gifts to be exact...it has 4 levels of lights...
Here are some tiny greens!  Aren't they cute!  I think they are adorable.  I started them inside and then I plant them out into the cold frame.  I am so happy to say that all these greens are from seeds that I saved last year!
I actually put some soil into one half of the cold frame and then plant some of the greens directly into the soil in the cold frame.  I know this is not the best pic but you can see them starting to grow.  In this pic, there is spinach at the top and then one I call Crispy Green and then some red leaf lettuce.  Then, there are a few rows of green and red leaf lettuce and the bottom row is arugula.  I should have lettuce to eat in early May from the cold frame.  I also planted greens directly into the garden and they will grow slower because they do not have the warmth that is generated from the cold frame during the day.  This is kind of like staggering the plantings...as soon as it gets too hot for the greens in the cold frame, the greens in the garden should be ready to eat.
Here are some seedlings that I have in the Stack and Grow.  "Egg" stands for eggplant (because I am too lazy to write the whole word)...I won't put these out into the cold frame until there are no freezing temps at night.
Here is a pic of the 2 cold frames I have.  I just ordered another one...I just LOVE these things!  I only use them in the spring to get things started and then when I am finished with them, I put them away for the summer.
In the cold frame on the left, I have mostly brassicas...broccoli, cauliflower, kale, swiss chard, and cabbage.  I put the cover on them at night.  They can withstand the cold temperatures at night so they can stay out here.  If it would get really cold (in the 20'sF), I will bring them inside for the night.  It usually works out that I can plant these out into the garden about the time that the eggplant and pepper plants will be ready to come out to the cold frame so I just rotate the plants through the cold frame to harden them off. 
Another project I have going in the house is the propagation of sweet potato slips.  This is my last attempt to grow sweet potatoes!  We don't really have enough heat in north Idaho to grow them but I keep trying!  The first year we moved to the farm, I ordered sweet potato slips.  I got them planted and they grew but we did not really get any sweet potatoes.  The second year, I ordered slips again but they were half dead when I got them.  I got my money back.  Sweet potato slips are quite expensive!  Last year, I decided to make my own slips.  That worked fine BUT I neglected them when I got them planted out in the garden.  I decided to see if I could grow the sweet potatoes in the cold frame but it was WAY too hot and I didn't get enough water to them because I was just busy with everything else.  
The fourth time is the charm...maybe?  I got the slips going again this year and I am potting them up so they will be good sized plants to transplant as soon as the weather warms.  I am much more hopeful this year.  I know they look a little yellow in this pic but I think it is mostly the lighting.  I am going to give them some fertilizer here soon.  I tried 3 different kinds of sweet potatoes to make the slips but really only the purple skinned sweet potatoes made good slips.  I am glad I decided to get several to try!
Back to the cold frames, last fall, I planted spinach in the garden.  It started growing and then the cold weather came.  I put the cold frames OVER the spinach in the garden for the winter.  I did not harvest the spinach in the winter, it was just to give the spinach a layer of protection and now it is starting to grow again...here is a pic of the spinach in the cold frame in February.  I have taken the cold frame off now and I cut back the spinach and I am waiting for new growth to happen...
I am starting flowers and more vegetables each week.  I am going to expand the flower growing area.  Here is a pic of the grassy area that Henry sprayed for me to help kill the grass.
I am going to plant "everlasting" type flowers here...we will see how this goes...I may be biting off more than I can chew...

Next, I will be starting tomatoes and the sunflowers will also be happening soon!  Also, some trees started showing up in the mail.  I had ordered these last fall and kind of forgot about them but now it is time to get them planted!  What are you growing this spring?

Have an eggcellent day!
~Denise


Sunday, March 27, 2022

Quarantining a sick or injured chicken...

 In the Coop    

When a chicken gets sick or injured, it is important to try and quarantine it right away.  Chickens are good at hiding their sickness.  They cannot show weakness or they will be at the bottom of the pecking order and may even be killed by her flock mates.  The flock cannot appear to have any weak members or it puts everyone at risk of attack by predators.  We have a quarantine cage in the chicken barn.  If a chicken gets hurt/sick, we put her in the cage so the other chickens can't get to her.  

We actually have a couple of quarantine cages, just in case we need to separate a couple different chickens at one time.  A sickness can spread through the coop quickly so it is important to remove any infected chicken right away.  Here is a list of symptoms of a chicken that may be sick: runny or liquid poop, wheezing, rasping, sneezing or ‘coughing’, pale comb, lack of appetite, bad smell, or swelling of the wattles or comb.  Of course, some of these may be hard to identify if you have many, many chickens.  We have been pretty lucky, knock on wood, mostly we have had to use the quarantine cages for injuries and not illnesses...maybe that is not so lucky...I don't know...
Make sure that the sick/hurt chicken has plenty of water.  This is a pic of Atilla the Hen, she was attacked by a raccoon in November 2020 and I thought she was as good as dead but she healed and is back with the flock!
If a chicken gets hurt and there is blood, the other chickens will peck at it.  They LOVE to peck at red things.  In fact, the nipples on the nipple waterers are always red colored to encourage the chickens to peck at it and that is how they learn to get a drink.  I made up some antibiotic ointment to put on the chickens if they are hurt.  Here is the recipe from Backyard Poultry magazine:

Antibiotic Ointment
3 oz calendula infused oil
0.5 oz beeswax
10 drops tea tree essential oil
10 drops oregano essential oil
10 drops Vitamin E
1 Tbsp honey
Melt the beeswax in the oil.  Turn off heat and add essential oils, vitamin E and honey.  Stir well and then quickly pour into tins to let set up.  

I also keep some Vetericyn Plus Poultry Spray on hand in case an injury is larger and a spray would be better than rubbing ointment into it.

Keeping this blog shorter. Spring has sprung this past week and there is MUCH to do.  I was busy yesterday on the farm and then took a minute to look around and noticed that the grass is really starting to green up!  I am expanding the flower area and we have a BIG surprise coming to the farm next week!  I will post about it on the Facebook and will have a blog post all about the surprise in a couple weeks.  So eggcited!!!

Getting seeds of vegetable and flowers started!  Here is a pic of some lettuce, arugula, and spinach that I have started.  I am so excited that all these plants have been started from seeds that I saved from last year!
Looking forward to longer and warmer days!

Have an eggcellent day!
~ Denise


Sunday, March 13, 2022

Using Beeswax and Herbal Salves

 In the Kitchen

In the fall, after growing and drying herbs and flowers, I like to make up some herbal infused oils.  Then, I use these oils to make salves.  It is relatively easy to make an infused oil.  All you need is some dried herbs and a carrier oil.  I usually just use olive oil.  Place the dried herbs in a jar and then pour the oil in and make sure to cover all the herbs.  Also, make sure that the herbs are super dry.  If there is any moisture in them, they may cause you oil to go rancid.  Here is a jar of dried calendula flower petals...
I added the oil.  Make sure all the herb/flower is covered by the oil.  Then, let it sit for 6 weeks.  
Strain and you have an herbal in fused oil!  I used some of this calendula oil to make an antibacterial ointment salve for the chickens and ducks.
To turn your infused oil into a salve, you need to add something to "thicken" it up.  You can add beeswax to do this!  For every 8 ounces of oil, add 1-ounce beeswax (by weight).  Beeswax has its own medicinal properties!  Click on pic to read more about beeswax...we use beeswax from the bees on our farm!
Here is a pic of the calendula oil and pieces of beeswax in a make shift double boiler.  Then, once all the beeswax is melted, you stir it well and pour into containers.
I use the calendula oil to make a Wound Healing Salve...
This infographic explains some of the benefits of calendula.  If you click on the pic, it will take you to an article about calendula.  I like it mostly for its antimicrobial properties.  We use it on minor cuts and scrapes.  Also, I had a pain in my shoulder and rubbed some in and it really helped the pain to go away...maybe that was its anti-inflammatory properties working...
I also make a comfrey salve in the same way with dried comfrey leaves.  Comfrey has been used in traditional medicine for at least 2000 years. It is also called bone knit or knitbone because of its amazing healing properties.  Comfrey is used to heal injuries such as sprains, strains, bruises, and burns.  You should NOT use comfrey on puncture wounds or the surface will heal too fast, not allowing the deeper puncture to heal properly. 


I have also used our beeswax to make chapstick.  It has some shea butter and coconut oil in the chapstick to make your lips nice and soft.  
I just added these items for sale in our online store.  You can click on this pic to go to the store...
Spring is in the air!  Get outside and enjoy!

~Denise


Tuesday, February 22, 2022

Foraging for conifer needles...

 On the Farm and in the Kitchen

I know spring is right around the corner but I have something to say about winter and foraging before the season is over.  For several months, I have been thinking about what else I could take to the Farmers Market to sell.  I enjoy making the jams and jellies.  I also enjoy growing sunflowers and I am thinking of expanding the flowers BUT I keep thinking about something else to offer and it has to fit in with everything else I am already doing!  I posted a blog about Apple Cider Vinegar in November.  I started thinking more about doing flavored vinegars.  I started "googling" flavored vinegars.  I found a post about pine needle vinegar and it said that it was similar to balsamic vinegar.  I LOVE balsamic vinegar so I just had to give this a try and this led me down a rabbit hole of conifer needle goodies...

For the vinegar, I started collecting conifer needles around the farm.  We have several types of conifer trees around our home.  I found this article to help with identification: How to Identify Conifer Trees: Pine, Fir, Spruce, Juniper & More  It was still pretty challenging to identify everything.  One big "take home" message for me is to stay away from Yew trees (they have red berries) and can be poisonous.  Luckily, we don't have any Yews.  I think we mostly have pine, spruce, hemlock, and junipers...but I could be wrong.
Making a pine needle vinegar is super easy.  Here’s how herbalist Susan Weed does it (from the article Pine Keeps You Fine):  “I preserve all the vitamins found in fresh pine needles by soaking them in apple cider vinegar for six weeks. I fill a wide-mouthed jar with pine needles and pour room-temperature, pasteurized apple cider vinegar over them until they are completely covered. A plastic (or non-metal) lid and a label with the name of the plant and the date completes the preparation. I call this tasty vinegar “home-made balsamic vinegar” and you will be surprised at how much it tastes like the store bought stuff —’Only better,’ say many, with a smile” (Weed, 2008, para. 4).

Here is my jar of pine needle vinegar.  I was surprised to see it fermenting away so there must be a good amount of sugar in the pine needles?  Side note for this next winter: You can also infuse vodka or gin with pine needles the same way and use to make winter cocktails!
Some uses for pine needle vinegar:
Pour a spoonful or more on beans and grains as a condiment
Use it in salad dressings
Add it to cooked greens
Season stir-fries with it
Look for soups that are vinegar friendly, like borscht
Put a big spoonful in a glass of water and drink it
Use it as a hair rinse to add shine to your hair!

Something else you can make with pine needles is tea.  Just pour boiling hot water over the needles and let them steep.  I did make some tea with a couple of different needles but I have to say that I just did not really enjoy it that much.  I will just stick to my own peppermint herbs for a tea.

I even found a cookie recipe that uses pine needles: Pine Needle Sugar Cookies  

Here is an article with 30 Uses for Pine Needles...everything from syrup and pastries to beard balm!  If you infuse a carrier oil with pine needles, you can use it to make a lip balm.  I am seriously thinking of doing this...just put pine needles in a jar and then fill it with oil and let it sit for 6 weeks. Voila!  You have a conifer infused oil to use in making salves and balms.

Some benefits of pine needles include: lifting your mood, dispelling worry and fatigue, relieving the pain of sore muscles, relieving headaches, soothing frazzled nerves, and relieving skin irritations.  I did see a recipe for a Headache Balm made with the infused oil.  

The great thing about conifer needles is that they are not seasonal!  You can go out and pick them any time of year.  BUT...Did you know that you can eat the bright new growth at the end of the branches in the spring?  They are called "tips" and spruce tips seem to be the most popular.  They have a bright, citrus flavor that works well in both savory and sweet dishes.  Almost all conifer tips are edible, and the only exception is yew trees.  Pine and fir tips have their own unique taste, and as an added bonus, all conifer tips have medicinal properties.  I had never really paid attention to tips before but the bush right by our front door always has some bright green tips and now I see it as a sign of warmer weather!

Conifer Tips ~ From left to right:
Hemlock Tips, Spruce Tips, Young Fir Tips, Older Fir Tips and Pine Shoots
Taken from Foraging Spruce Tips

I just love finding new uses for something that we have lots of and there are a good amount of conifer trees around our property.  I am hoping to make a gallons of apple cider vinegar (from the 50 apple trees we have) this fall so I can make lots of fun, flavored vinegars next year!  I just need to get some bottles and I should be able to get started.  I am going to put some pics of bottles in a Facebook post later this week and would love some input!

Have an eggcellent day!

~Denise


Sunday, February 13, 2022

Using eggs in your beauty routine!

In the Bathroom

Eggs can make you beautiful on the inside AND outside!  I am going to be honest.  I have not had much personal experience using eggs for any beauty routine.  To be honest, I don't really have much of a beauty routine at all.  However, I do know that eggs have multiple uses in beauty regimens (just google egg and beauty).  Most of the information that is in this blog are taken from other blogs and there are links to the original content.

Eggs and Hair Mask

Eggs have protein and several vitamins (see list below pic) that can make your hair soft, strong, and shiny.  Lecithin, in the eggs, helps to clean the dirt and greasiness without stripping out the natural oils of your scalp.  There are actually egg shampoos that you can purchase.
Vitamin A- It enhances sebum production in hair, thus keeping away the problem of dandruff. Besides, it also deals with the problem of hair loss.

Vitamin B- This vitamin plays a crucial role in supplying adequate oxygen to scalp, thus improving the overall circulation in hair.

Vitamin D- Improves the strength of hair, fighting with the problem of hair loss simultaneously.

Vitamin E- Deeply cleanses hair follicles and scalp, providing optimum and much needed levels of moisture to the scalp.

Fatty Acids- Makes hair more lustrous than ever before. It also strengthens them from roots and thus, prevents hair loss.

One way to use eggs in your hair is to make a mask and leave it in your hair for a while and then wash it out.  Taken from Beutyepic.com...here are some of the benefits of using a hair mask: softens and moisturizes hair, reduces hair fall, promotes hair growth, nourishes hair follicles, cleanses scalp and makes hair shiny and silky.
Egg Honey Apple Cider Vinegar Hair Mask:
1 egg
2 tablespoons of honey
1 tablespoon of apple cider vinegar

Mix all the ingredients to make a smooth paste.
Apply this paste to your scalp and hair with your fingertips.
Leave it on for about 45 minutes, then shampoo your hair.

I did try this egg hair mask.  It was pretty thin so that made it challenging to apply.  I wish I had a shower cap to keep it in place but I just put a towel around my shoulders to catch any drips.  My hair did feel soft and more "full" after washing and drying.  I want to try to do this more in the future but it is pretty messy.  

Here are some more hair care tips from Haircaresquare.com :
If you have dry hair, use only egg yolk
If you have oily hair use only egg white
If you have normal hair, use whole egg (both egg whites and yolk)

Eggs and Face Mask

Egg shells are full of calcium and minerals.  Eggs also contain collagen that aids in improving skin elasticity and firmness, and the protein in egg whites helps reduce the appearance of fine lines and wrinkles.  You can make a face mask with egg white and egg shell for bright and flawless skin.  Taken from Beautyglimpse.com:

Eggshell Face Mask
This is an all-in-one eggshell face mask that can beautify by nourishing, brightening, and firming your skin. To prepare it, separate the white from the yolk and beat the white portion. Now, mix the eggshell powder with the egg white and whisk properly. Use it all over your face, massage gently for a few minutes by using your fingertips, and allow it to dry. Then, wash it off with fresh cold water. It will give you a healthy and shiny skin while preventing premature aging.  (To make eggshell powder just crush dry eggshells with a grinder.  You can heat them at low heat in the oven to make sure they are germ free and dry.)

More beauty tips using egg taken from Makeupandbeauty.com:

• Egg For Toning The Skin– Whip an egg till it becomes frothy. Apply it all over your face as well as neck. Wait till it is dry and rinse in lukewarm water. This practice would help to tone and tighten your skin.
• Egg-White For Firming Pores– Take an egg and the egg-white has to be separated from the yolk. Beat the egg white to produce a thick foam and now, apply it on cleaned face. Wait for about twenty minutes and wash off with lukewarm water. This mask helps to firm skin pores and also treat acnes.
• Egg To Reduce Under-Eye Puffiness– If the skin under your eyes seem puffy and your eyes look tired, apply a thin coating of egg white on the area under your eyes and leave on for about ten minutes. Wash off with plain water. Eggs are known to fix puffy eyes effectively.

It seems that a lot of these recipes just use the white.  Did you know that you can use an empty plastic bottle to remove the yolk from an egg?  Just push the air out of the bottle and then suck up the yolk leaving the white behind!
Enjoy using eggs in your beauty routine...they are natural and great for your skin and hair!

Have an eggcellent day!
~Denise


Sunday, January 30, 2022

Security on the farm...home, electric, and feed...

Security On the Farm and Home

Technically, we live in the county and our property borders the city limits but we are not in the city but VERY close.  We have a long driveway that is almost a quarter mile long.  We share this driveway with our one neighbor.  Both of our mailboxes are at the end of the driveway right off A Street.  

You canNOT see our house from the street.  The driveway winds around the side of a large hill.  There is one straight part when you first come in and then you go over a cattle guard and turn left and head west for a small bit and then turn right and head north again.  The driveway literally ends at our house and that is where the gate is located, right where the driveway ends into our property.  

I hope that all makes sense.  The only reason I bring it all up is because several times, we have had people come onto the property and "mess" with things.  Again, you cannot see our house from the main street so you really have to come down the driveway about a quarter mile to get to our house.  

Here are some things that I can remember happening:  

The first time that we went to Salt Lake City to visit Joshua, someone came into our home.  The neighbor was feeding the dog and cat at the time.  On our last day away, he called and said that the front door was wide open when he came over.  There was a cigarette butt on the floor in the entryway.  It doesn't appear that anything was taken.

Several times, we have heard someone knocking on the window at like 3:00 or 4:00 in the morning (or maybe that is a ghost).

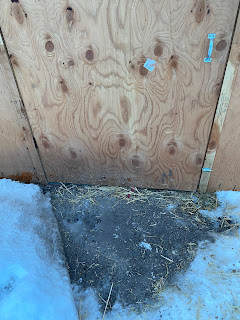
December 2020 (I think), we had just had a good size snowfall and someone walked down the driveway in the middle of the night and broke our keypad (for the automatic gate) out of the holder.  It is plastic and they must have used something to break it.  Luckily, when the snow melted, the neighbor found the keypad at the end of the driveway in the melting snowbank, a quarter mile from where the keypad holder is located.  

The ghost has also moved our full trash cans from the curb, where they were waiting to get emptied, back to our mailbox area (so then the trash did not get picked up).

Just a couple weeks ago, the driveway was frozen and icy and someone was coming to get duck eggs.  I told them I would put the eggs in a cooler at the mailbox so they would not have to come down the slippery driveway.  Luckily, the neighbor decided to walk to get his mail and as he came around the corner he saw someone at the cooler and they ran off.  They had already smashed some eggs and broke the egg carton.  You cannot even see the cooler from the street so they would have had to walk into the driveway to see it.  

After the person walked down and smashed our keypad, the neighbor put up a game camera along the driveway and someone sprayed sealant on it and basically ruined it.

Last spring, the ghost opened the valve on my full rain barrel and let all the water out.  I thought Henry had done it because he kept telling me that I should leave it full of water over the winter but he said he hadn't touched it.  

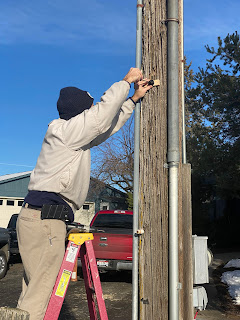
So....we have been wanting to put some type of security system in place for a while.  I did put some of my game cameras up along the driveway but I had to turn them on and off each day and that got old after a while.  Finally, last weekend we put up automatic cameras that sense motion detection all around the house!  Let's see if this helps!  Ghosty...you have been warned!

Electricity security

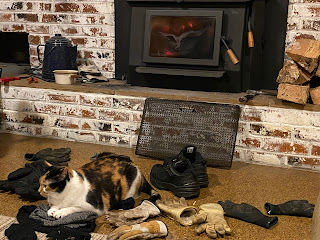
Speaking of security...another project we are working on involves planning for power outages.  Luckily, we have not had any major power outages yet since moving to the farm.  BUT it has been on my mind since we moved here.  First, we have a well and we need electricity for it to pump so we have water.  I would not want to be without water with all the critters depending on us.  I am not too worried about heat because we have a nice wood burning stove to take care of that in the winter.  The wood stove can heat the entire downstairs of the home so we would not spend a lot of time upstairs which is no big deal.  We just need to keep a good supply of firewood.    

I was listening to a 
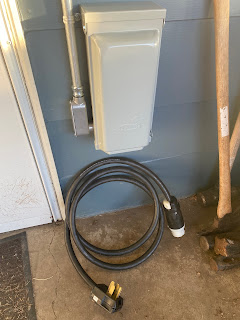
podcast and the lady talked about how they could plug their generator into their electric panel in the home and power their house that way.  This intrigued me.  I called up the electric company and they came out and installed wiring from the breaker box to an outlet that they mounted on the outside of the home.  Now, we can just plug in a generator and run the refrigerators, stove top and some outlets and lights!  However we still need to purchase a generator.  I know which one I want and I guess we will wait for our tax return to purchase it.  Fingers crossed we don't need it before then!  Joshua would LOVE for us to get solar panels.  It is something I have thought about but not ready to dive into yet.

Feed security

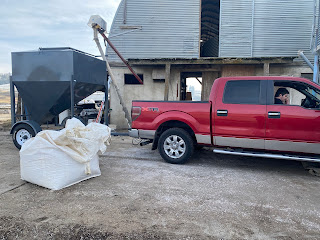
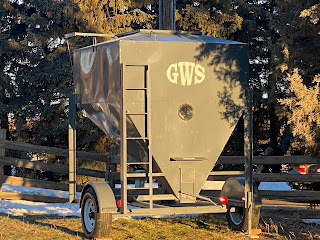
This past week, we took a big plunge with providing for Mark's egg business.  We bought a 3 ton portable grain bin!  Up until now, we have been buying 40 pound bags of feed for the girls.  We have been buying it from a farmer.  He buys bulk feed and then puts it into the smaller bags to sell around the area.  We always get our delivery of feed on the first Saturday of the month.  Last month, we got 25 bags of layer feed and 10 bags of chick starter.  In March, the chicks will be switching over to the layer feed.  If you do the math, this is 1400 pounds of feed.  All in small bags.  That is a lot of bags to lug around.  

It is most cost effective to buy feed in bulk (like the farmer does) and we are finally at a level of production that warrants us getting our own bulk feed directly from a grain mill or farmer.  But to do that you have to have some way to haul the feed around!  The feed bin was expensive but the cost of the feed is going to be lower by buying in bulk versus little bags.  This is going to be a real game changer for Mark's business and will allow him to be more profitable!  It should pay for itself in about 2 years...ugh!
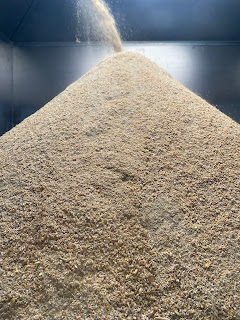
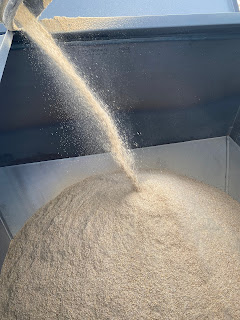
We drove up to Post Falls to get the grain bin.  I decided to see if we could get some feed since we were going to be up near Coeur d'Alene and Spokane.  There is only one farmer that mills feed in our area and they are not taking new customers.  Luckily, I found a mill that was not too far out of our way so we stopped there and got a ton of feed on our way home.  
After getting the feed and starting our drive back home, I got a message from our feed dealer saying that he was ending his feed business.  Talk about timing!  He was having trouble buying feed...remember that drought last year...it is affecting the feed supply...
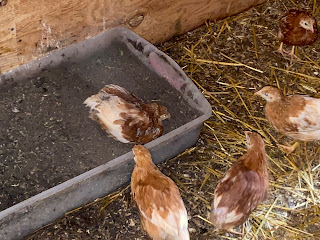
The chicks have been eating chick starter and we usually keep feeding them chick starter until they are getting ready to lay which will be in March.  I did a little more research into the protein requirements for young chickens.  The most important time for high protein feed, aka chick starter, is the first 7 weeks.  The chicks are 11 weeks old so they can be put on a lower protein feed now.  We will probably just start feeding the chicks the layer feed when our current chick feed runs out.  More good timing.  If we get to a point that we can fill the whole 3 ton grain bin, we have feed security for the girls for several months!
Working hard to keep the farm safe and secure...have an eggcellent day!
~ Denise


Sunday, January 16, 2022

Using wood ashes and charcoal with poultry and on the farm

In the Coop

We have been enjoying the wood stove a lot this winter.  Every now and then, you have to clean out the ashes.  Then, the question is...what do I do with these ashes?  Luckily, there are lots of uses for ashes on the farm.  

Here is a pic of Beck (cat)...she loves hanging out by the fire...with all the wet gloves, hats, and shoes!

Nutrition and Detox

To begin, wood ash contains important minerals such as calcium, potassium, magnesium and phosphorous. Sprinkling a pinch of wood ash on the feed nourishes the girls, especially egg-laying chickens. They need these important minerals to lay eggs!  Wood ash also works as a detoxifier and removes toxins out of the chickens and ducks bodies.  I usually use a sifter to screen the ashes and remove the charcoal pieces.  (I even have some charcoal pills that I bought and take from time to time to help detox my system.)
I put the charcoal pieces into a small rubber tub and let the chickens and ducks "peck" at them.  Putting a little charcoal in the waterer is helpful in avoiding harmful algae and bacteria from developing. Side note: this will make the water a gray color which is not visually appealing.  

Pest Control

The fine ashes that fall through the sieve are mixed with sand and used to make a dust bath for the chickens.  Dust baths are great for keeping parasites from "bugging" the chickens because the ashes suffocate fleas, lice, and mites.  Ducks prefer to swim in water and preen to control pests so they do not use a dust bath.

Odor Control

Wood ash can neutralize coop odor. I just sprinkle some wood ash on top of the bedding on the floor.  The chickens like to scratch through it and will eat little pieces.  Wood ash reduces the amount of ammonia in manure by preventing fumes from forming. Wood ash is alkaline and mixing it with manure in the coop helps in regulating its acidity.  The ashes are absorbent too so they help to keep the coop dry too.

Natural De-icer

Another use is to put the ashes down on the ice to provide some traction.  There was a slab of ice forming in front of the door to the new coop so I spread a thin layer of ash on the ice and voila! No more slipping!  I wouldn't put ashes on the doorstep of your home because that would cause you to bring in lots of black yuck on your shoes but it is great for this situation because I always take my boots off first thing when I come back into the house...

In the Garden

Ashes are great in the garden for plants that prefer alkaline conditions such as asparagus, beets, tomatoes, and fruit trees.  If we have a bunch of extra ashes then I also add them to the compost bin and mix them in.  

In 2019, we got a new wood stove and it is so efficient that we do not get many ashes!  Luckily, we also have a large burn pile that I can harvest some ashes from in the summer.  I still wish I had more this winter.  I am using them as fast as we create them!  

Have an eggcellent week!
~Denise